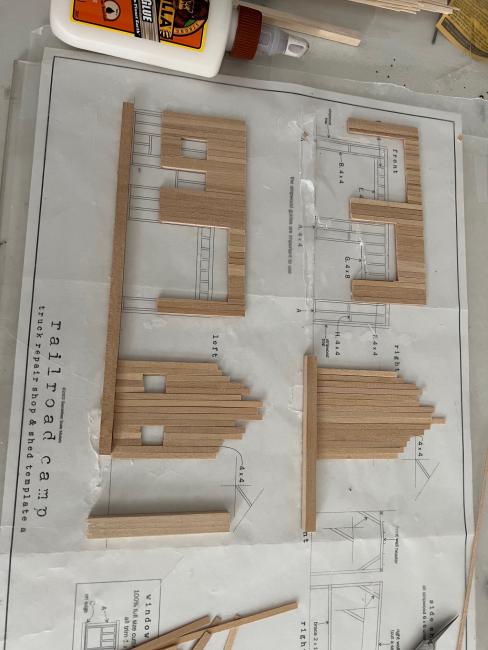
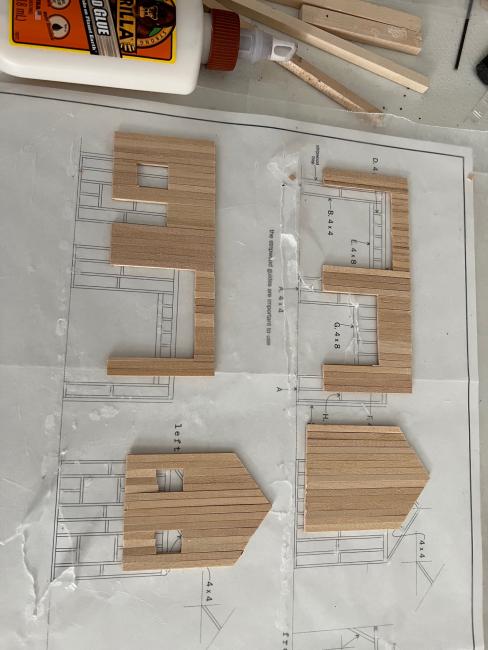
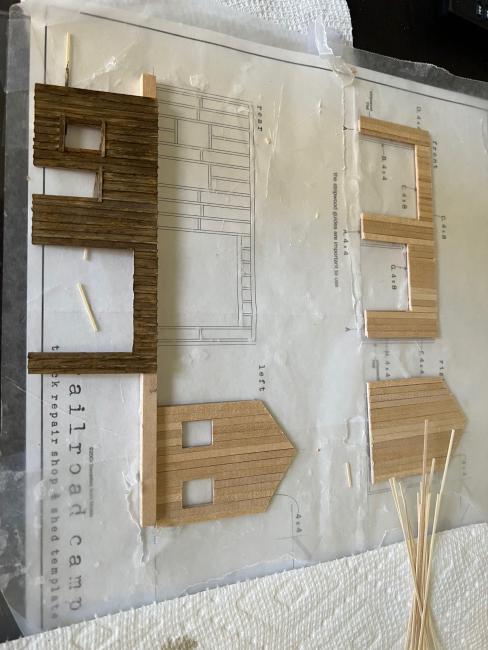
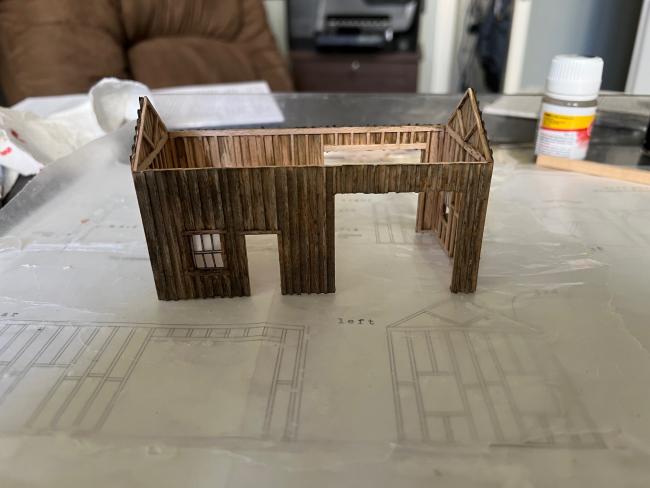
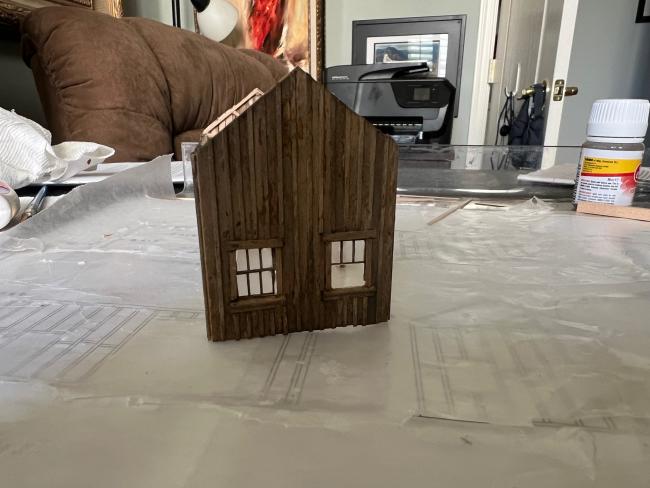
Thought I'd make a contribution and show work in progress. Assembling framing over wax paper on templates isn't too difficult, nor is the first layer of siding. I did find the work on battens to be challenging due to the size and needing to align then properly, while applying glue. I had some problems with window frames breaking. This may in part be due to the fragile size though most likely the material is somewhat brittle as the kit was made several years ago. The kit was complete when I bought it from a hobby shop a few years back but don't know how long ago it was originally purchased. For weathering I used a mix of weathering and alcohol and am reasonably pleased with the result. I'm planning to continue with this building scene (side shed, roof and details) before moving on to the Boiler and Welding Shop.
The results are looking good so far and the walls are coming together well.
Did you not get the instruction manual in the second hand kit you bought?
The instruction manual was included. The kit was complete and not started, and the bags had not been opened. The instructions are thorough. For the weathering I'm sure many of the products recommended are no longer sold so I made my own mix. In person it is a little lighter than the pictures so I'm content with it.
Not sure why you would say that the products for weathering are no longer sold? They are and I have a page on my SWSM website (the "University" link) dedicated to keeping the materials and supplier listing up to date in the event that changes.
Thank you for pointing me there. I was mainly thinking of the Floquil paints (30% Floquil Roof Brown, 10% Floquil Grime etc). Will look for the alternatives on the web page going forward. I actually have Dick Blick and Michaels stores within a few miles of me so that is good.
Thank you for the encouraging comments. I have to admit when I've seen the work on the SW website and posts by Karl on Facebook almost daily I'm amazed and think I can't possibly do justice to these kits. However, I don't want to just be a lurker here so do want to try, and share along the way.
Craig, This is a GREAT place to learn modeling skills from some of the hobbies best modelers. Keep posting your builds. They will inspire others to post theirs and you will likely receive some tips and techniques to improve your work. SW kits are fun to build and have the best instructions where you can learn and improve your modeling skills.
Thanks so much Craig, we are definitely all here to admire your work, and also help and support you along the way.
I was confused as you had assembled the walls before colouring the wood, and that process is not in any of the manuals. That is why I asked if you had the manual or not.
Now that you mentioned the floquil stains etc I realize that this is the original HO version, I also looked closer and saw the text font on the templates.
It is coming together great and I cant wait to see your next updates on this awesome kit, keep posting progress pics as you go for us all to enjoy your work.
Greetings. Almost a year since I introduced myself and posted here. I have been working on Railroad Camp off and on and am getting close to finish. As you can see I didn't make it exactly like the instructions but pretty close, including the size and arrangement of the scene. What I want to ask about is ground cover. I was trying to follow the instructions in this regard with placing details while the applied ground cover is wet. I applied the dirt and gravel with the method of glue, misting alcohol and then liquid glue. The problem is the dirt has come out a darker brown than intended. The gray is Woodland Scenics gravel, and that is fine but the brown dirt is darker than I want. I can go buy some other ground cover material and try adding on top. Any other suggestions on how to get this to a lighter brown before going further?
Hi Tom, I hope you're doing well. I do have some Earth Fine Turf, which to me looks about the same before adding glue. I picked up some Earth Blend that is lighter so thinking I'll try that over the dark brown and stick with gravel in areas that it makes sense for vehicles to drive on.
Hey Craig, wonderful work here thus far. Railroad Camp is a classic and one of my favorite designs from SWSM. Regarding the dirt. I always use real dirt so can only give you my take regarding that medium. Dirt will darken a bit following the "wet water" application. I go out and find several shades of real dirt and then dry and sift it. I make sure the dirt does not have a high clay content. What did you use for the "brown dirt"?
If the dirt when dry is too dark, you can spread some lighter dirt on top. Make sure your glue mix is not too heavy on the glue side as this can further cause undue darkening. You can also lighten the dry dirt with lighter shades of pigments or dry, finely sifted, real dirt. Do this dry and with an old brush. You don't need to re-wet this application with the "wet water" if applied in a light application. By the time you lighten strategic areas like pathways, add ground covers and other materials she should look fine.
Here is a picture of my most used real dirt color. Note that it's very light and will darken a bit once applied.
Hey Craig, wonderful work here thus far. Railroad Camp is a classic and one of my favorite designs from SWSM. Regarding the dirt. I always use real dirt so can only give you my take regarding that medium. Dirt will darken a bit following the "wet water" application. I go out and find several shades of real dirt and then dry and sift it. I make sure the dirt does not have a high clay content. What did you use for the "brown dirt"?
If the dirt when dry is too dark, you can spread some lighter dirt on top. Make sure your glue mix is not too heavy on the glue side as this can further cause undue darkening. You can also lighten the dry dirt with lighter shades of pigments or dry, finely sifted, real dirt. Do this dry and with an old brush. You don't need to re-wet this application with the "wet water" if applied in a light application. By the time you lighten strategic areas like pathways, add ground covers and other materials she should look fine.
Thank you, Ken. I did use real dirt that I had sifted. It was lighter medium brown before applying and gluing. I likely used too much liquid glue (with a pipette). I will try adding lighter in areas and see how that goes. Also will experiment on a separate base, following your tip on not adding more glue, before completing ground cover on the back half.
Really shaping up to be a wonderful diorama. Craig. Your buildings and weathering look truly excellent. I have nothing to add to what Ken said other than to agree with him that once everything "else" is on there (scenic items, castings, etc) it will not read as stark a brown. Great job!
PS. I use Woodland Scenics "Scenic Cement" exclusively and it seems to be the right mix for me and you don't have to guess what the ratios of glue to water were last time-- and no scary misting! It's expensive for what it is but you will only use maybe 1/4 bottle on a diorama of this size.
Thank you all for the tips and comments. Almost done. Adding a thin layer of lighter dirt over the dark brown wasn't hard, and have most details in. Ready to start on completing the crane and roofing. I'm not fast at this (was never fast on the laser kits either) . Will post pictures when complete.
I'll call it 98% complete now. Some touch ups as I see them and a bit of light green shrubs or weeds. I do want to build the flat car that came with the kit though a 30' UP flat car is fine for now. On the final build steps I followed the instructions on prepping the tarpaper for the Boiler & Welding Shop to spray paint (I used moss green) then apply dull coat followed by alcohol and chalk dust. Definitely better than roofing for models I've built in the past. Anyway, big thank you to Tom M for getting me started with the Office & Warehouse, and to all the modelers who post tips. Great as the instructions are its still good to read though these threads, and to see pictures.
Looks fantastic Craig! Would enjoy seeing some more pics of all the nifty the details. Beautifully designed kit and you certainly got me looking forward to working mine up some day. Well done.
Thank you, Ken. Here are more photos with the details. Sometime I'd like to find a vehicle or machinery to have in the Truck Repair Shop depicting mechanics working.
Comments
Jerry
Did you not get the instruction manual in the second hand kit you bought?
I was confused as you had assembled the walls before colouring the wood, and that process is not in any of the manuals.
That is why I asked if you had the manual or not.
Now that you mentioned the floquil stains etc I realize that this is the original HO version, I also looked closer and saw the text font on the templates.
It is coming together great and I cant wait to see your next updates on this awesome kit, keep posting progress pics as you go for us all to enjoy your work.
If the dirt when dry is too dark, you can spread some lighter dirt on top. Make sure your glue mix is not too heavy on the glue side as this can further cause undue darkening. You can also lighten the dry dirt with lighter shades of pigments or dry, finely sifted, real dirt. Do this dry and with an old brush. You don't need to re-wet this application with the "wet water" if applied in a light application. By the time you lighten strategic areas like pathways, add ground covers and other materials she should look fine.
Here is a picture of my most used real dirt color. Note that it's very light and will darken a bit once applied.
PS. I use Woodland Scenics "Scenic Cement" exclusively and it seems to be the right mix for me and you don't have to guess what the ratios of glue to water were last time-- and no scary misting! It's expensive for what it is but you will only use maybe 1/4 bottle on a diorama of this size.