Howdy, Stranger!
It looks like you're new here. If you want to get involved, click one of these buttons!
Categories
- 996 All Categories
- 3 Picture Posting and Resizing
- 58 New Member Introductions
- 120 Off-Topic Forum
- 4 Photography
- 2 Resources
- 18 New Product Information
- 170 The SierraWest Forum
- 10 Brett's Blog
- 121 General News & Ramblings
- 3 Re-Release Information
- 6 Q & A about SierraWest
- 9 What Would You Like to See?
- 408 Builds
- 145 HO Scale Builds
- 180 O Scale Builds
- 62 Finished SW Build Pics
- 15 Miscellaneous Builds
- 195 Techniques
- 19 Working with Wood
- 23 Painting Castings
- 5 Masonry
- 23 Scenery
- 37 Tools and Supplies
- 22 Layout Planning & Building
- 40 Miscellaneous
- 24 Prototype Information
- 22 Reference and Research
Scotia Supply
Hello Everyone,
I started building Scotia Supply this afternoon. I believe it is a re-issue from the early 2000s.
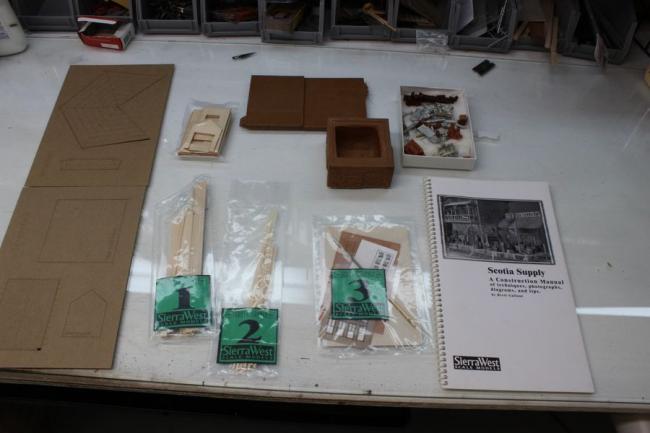
My first step in any build is always to pull everything out and page through the instructions. All SierraWest kits are loaded with top quality components and this kit is no exception.
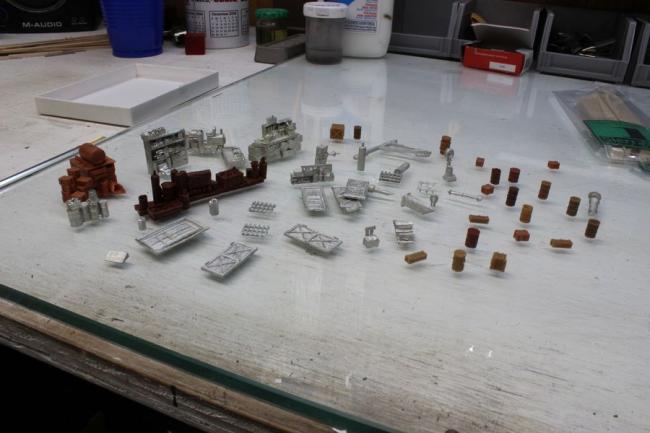
I removed all the castings from the box and cleaned up any flash. It's rare to find one of Brett's castings really needing any cleaning up.
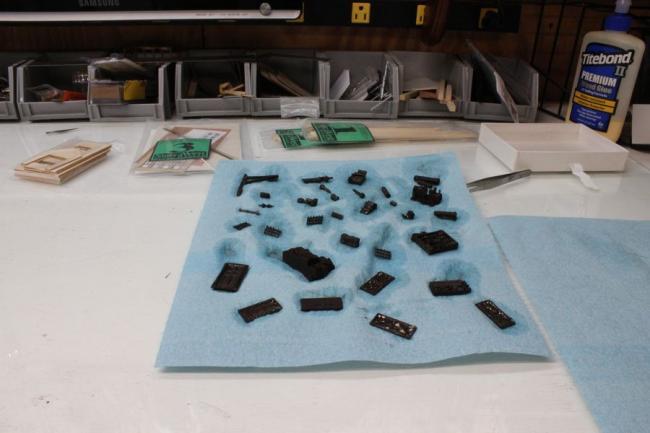
I blackened all the metal castings using Jax Pewter Black.
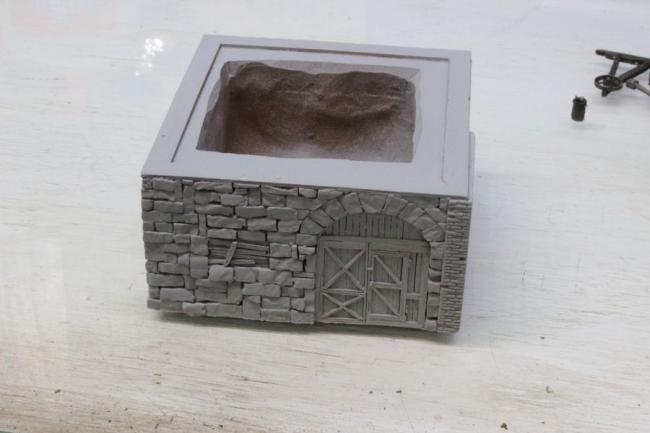
I primed the stone base and the concrete platform with Rust-Oleum 2081 Light Gray Primer. Lots of cool detail in this solid resin casting. It also smells like my grandmothers closet.
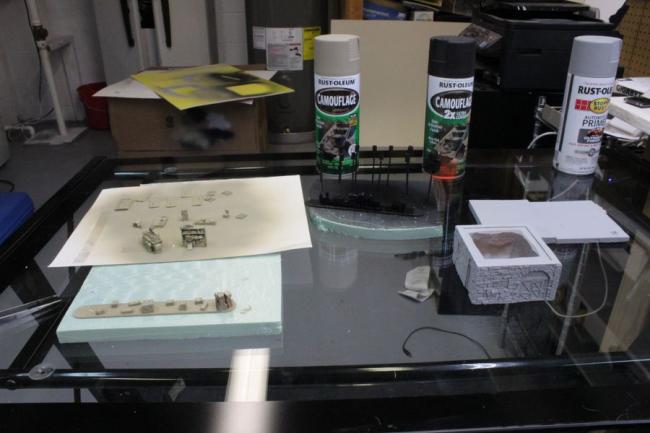
The castings are all primed. They are still pretty wet in this picture. I prime some of them with Rust-Oleum 270179 Black and some with Rust-Oleum 1917 Khaki. If they are primarily wood I use the Khaki. Black if they are mostly metal. I do use Black for wooden barrels. It's easier to rub the paint off the metal bands than try to paint them black.
Thanks for checking in.
-Steve
I started building Scotia Supply this afternoon. I believe it is a re-issue from the early 2000s.
My first step in any build is always to pull everything out and page through the instructions. All SierraWest kits are loaded with top quality components and this kit is no exception.
I removed all the castings from the box and cleaned up any flash. It's rare to find one of Brett's castings really needing any cleaning up.
I blackened all the metal castings using Jax Pewter Black.
I primed the stone base and the concrete platform with Rust-Oleum 2081 Light Gray Primer. Lots of cool detail in this solid resin casting. It also smells like my grandmothers closet.
The castings are all primed. They are still pretty wet in this picture. I prime some of them with Rust-Oleum 270179 Black and some with Rust-Oleum 1917 Khaki. If they are primarily wood I use the Khaki. Black if they are mostly metal. I do use Black for wooden barrels. It's easier to rub the paint off the metal bands than try to paint them black.
Thanks for checking in.
-Steve

Comments
"Scotia" is pronounced like the place in Canada "Nova Scotia". I have been asked a lot over the years about that. It was named after a gold claim in the Sierra Nevada mountains during the 1800's gold rush. Thus the name "Scotia Mining Supply" which was generically shortened to simply "Scotia Supply".
Btw, the large stone block casting makes a great paper weight!
I’ll be following along closely Steve, well done!
Smells like your grandmother's closet how come you didn't mention she was building Brett's kits before you did!!
Jerry
So start now and you'll be done before your birthday!!
Jerry
I’m not sure how I’m going to lay the base but I think it will be pretty close to the plans. I’m going to stick with similar colors for the building but I’m going to color them using newer techniques.
Hopefully I’ll get some time tonight to dig further in.
I colored a few stones with some thinned out craft paints.
I added a light coat of A&I over the stones. I'd rather do several coats of lighter washes to get the color I want. It's easier to control.
This is after 3 washes of A&I. The photo is coming out considerably lighter for some reason.
I took a few minutes to color some of the wooden crates. I'm going to approach this build a little different. I usually paint all the castings towards the end of the build. I'm going to paint everything up front this time. I really get bogged down with the castings towards the end and I lose momentum on the project.
I'm in the process of getting my photography setup upgraded. Brett gave me some good pointers but I had to order some lights. Hopefully I'll be able to get some clear, more detailed photos as this build gets moving along.
Thanks for checking in.
-Steve
I especially like the floating look from sitting on the glass!
Geezerbill
I drybrushed all the stones with a very light gray craft paint. I painted all the areas that represented boarded up windows with SW Earth from the Reaper kit as a base coat.
I scrubbed some dry chalks into the boards. Various colors all wood tones. This window was originally a piece of corrugated metal that has since been covered with boards. I colored the small section of metal showing with a mix of SW Roof Brown and Dark Rust. I dusted it with some rust tone chalks.
I then used a small brush to wick some A&I into the edges of the boards. I also very carefully dusted some black chalk in a few areas of the wood to pull some shadows out and make it look a little more rotten. The black chalk adds some cool effects but it can really ruin a good weathering job if you aren't careful. I speak from experience.
I played a bit with some wall colors. This is Apple Barrel Marsh Green with some A&I over it. I'm also playing around with the peeling paint a bit. I'm figuring since the lower floor windows are all boarded up the rest of the structure is going to be pretty weathered but not abandoned. The peeling paint was done by coating the siding with mineral spirits before I applied the green color. After the paint dried I pulled it up with some scotch tape. Although I like the way this looks I still have a bit more experimentation before I completely settle on the wall coloring.
Thanks for checking in.
-Steve
Geezerbill
I really like the stone casting and the door. The peel on the clapboard is great! Congratulations on the expo contest! I really enjoyed watching your last build come together. Amazing modelers on the forum for shure.
Jim
It’s good to hear you enjoyed it Jim. I had a great time building it. I’m thinking this should be a quicker build for sure. I’m glad you are following along, I’ll try to keep it interesting.
-Steve
Just catching up on this build. So far so good. I like the peeling paint effect. In the photos it's pretty subtle, but effective. Really looking forward to following along.
I finished most of the detail work on the base over the weekend. The only piece I'm not sure about is the board capping the top of the stone. I'm tempted to paint it to simulate wood but I'm afraid the thin color line in between the stone and the green will be very distracting. I think I'll wait to see how much of it shows once I have the sided portion complete and set on top.
I painted the 2 brick area with Americana Burnt Sienna mixed with a little Apple Barrel Barn Red. I prefer a slightly orange brick. Of course this looks terrible right now.
Same color here. Terrible.
I paint on Apple Barrel Antique White and rub it off with a rag. I wanted these brick sections to have a very defined grout. Sometimes I skip this step. This still looks pretty bad at this point. I need to tone it down.
To tone the brick down I washed over the brick with A&I. This is after 2 A&I washes.
I also dirtied up the brick on this door and colored the trim with Apple Barrel Khaki.
I colored the door with Apple Barrel Marsh Green and Khaki. I weathered it with some A&I followed by some chalk. After this picture was taken I blended the chalk a little better. It came across a little splotchy here. For me that's one of the benefits of taking close up pictures as you go, you can correct something you might not see till later.
I'm going to work on the siding next.
Thanks for following along.
-Steve
Green doors look great.
Bryan
I'm still not sure how I'm going to handle the cap. I'm thinking of making it look like tan wood. Similar to the wood on the boarded up windows.
I got to work on the siding tonight. First I added some pretty aggressive grain with my wire brush. After that I added some split boards and a few board ends with a razor blade and a #11. Every time I build a kit with milled clapboard siding I'm torn over nail holes. They really shouldn't be visible in HO in my opinion but they add a level of detail and texture that I do like. I decided not to add them on this model.
After I detailed and textured the walls I primed them with driftwood from Roundbell. I honestly don't know if this is a necessary step. I've built kits with and without a driftwood primer. I think the only time it's an issue is if the wood has a huge noticeable grain texture that goes between several clapboards. I bought 5 bottles of this stuff when my local hobby shop went out of business so I'm using it.
After the driftwood dried overnight I coated the siding in A&I. This will give me some color under the paint when I start pulling it up.
I coated the siding with mineral spirits and just when it starts to dry but still has a sheen to it I painted the wall with Apple Barrel Marsh Green. This is after 2 coats. It really looks horrible, I'll fix it I promise. I've done this technique using 1 coat and I find it doesn't pull the paint as well.
I used a wire brush over the siding first to scrape off some smaller areas and break the paint up a bit. After that I used some scotch tape and pulled several sections up. The neat thing about this technique is if you can really meter how much paint you pull up by how hard you press the tape into the siding. Any spot that I added detail I used my xacto and scraped more paint off.
I washed the wall with A&I again. I really needed to tone it down a bit.
This is after 2 coats of A&I. After the second wash I felt like everything started to blend together and feel more natural. I think this as dark as I want to take the walls. I'll revisit the color tomorrow and see how I feel about it.
I propped the siding up against the front of the stone base. I really wanted to make sure my green door and my green siding ended up the same color. It looks pretty good to me.
I glued the bracing to the back of the siding and I'll let that dry overnight. The driftwood, 3 A&I washes and the paint thinner really warped these walls good.
Next step trim and windows.
Thanks for checking in.
-Steve
Geezerbill
I look forward to seeing how the build progresses.