Howdy, Stranger!
It looks like you're new here. If you want to get involved, click one of these buttons!
Categories
- 996 All Categories
- 3 Picture Posting and Resizing
- 58 New Member Introductions
- 120 Off-Topic Forum
- 4 Photography
- 2 Resources
- 18 New Product Information
- 170 The SierraWest Forum
- 10 Brett's Blog
- 121 General News & Ramblings
- 3 Re-Release Information
- 6 Q & A about SierraWest
- 9 What Would You Like to See?
- 408 Builds
- 145 HO Scale Builds
- 180 O Scale Builds
- 62 Finished SW Build Pics
- 15 Miscellaneous Builds
- 195 Techniques
- 19 Working with Wood
- 23 Painting Castings
- 5 Masonry
- 23 Scenery
- 37 Tools and Supplies
- 22 Layout Planning & Building
- 40 Miscellaneous
- 24 Prototype Information
- 22 Reference and Research
Yet another Oneill's kit.... my first HO SW build.
I've already owned this kit for almost a year, but being buried in other projects kept me from starting. I got some space cleared and finally opened up this amazing kit. Of course I did the obligatory Oooh's and Aaaah's (even though I did that when I first received this kit), I felt a need to re-familiarize myself with the manual and marvel at all the pieces and parts again.
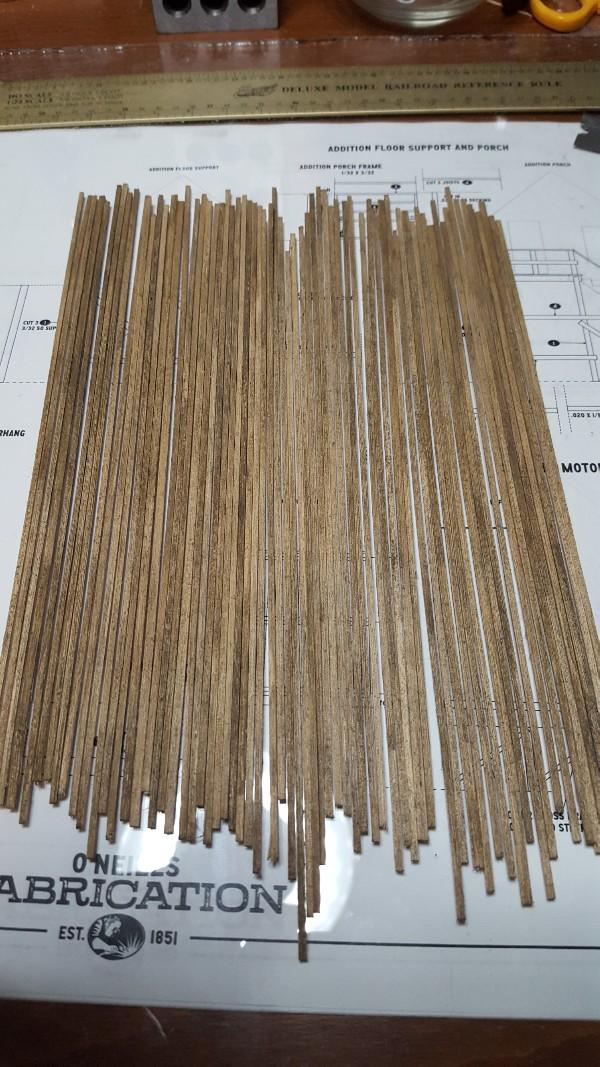
Now it's on to business, I may not get as much done, as fast as some of you guys, but I opened up the first bag and started graining, and staining the first set of boards for the main walls. I haven't painted them just yet, and thought I would show my progress.
I like the colorization that I achieved, the only thing I see that I think needs more work, is that none of the knot holes that I put in showed up in the staining process. I think the reason being is that the compass that I used might have been too sharp to make a big enough hole. I will come around and try to fix it with something a little more blunt, and carefully adding a drop of A I solution to highlight them.

Of course, at any time I am open to hints, tips, tricks, suggestions, critics etc..... and I will update this as I go.
Now it's on to business, I may not get as much done, as fast as some of you guys, but I opened up the first bag and started graining, and staining the first set of boards for the main walls. I haven't painted them just yet, and thought I would show my progress.
I like the colorization that I achieved, the only thing I see that I think needs more work, is that none of the knot holes that I put in showed up in the staining process. I think the reason being is that the compass that I used might have been too sharp to make a big enough hole. I will come around and try to fix it with something a little more blunt, and carefully adding a drop of A I solution to highlight them.

Of course, at any time I am open to hints, tips, tricks, suggestions, critics etc..... and I will update this as I go.

Comments
I typically let the bristles stick out about 1/16 of an inch or just a little longer, and get fairly rapid results.
What is the item number or description on Amazon I can't find it? Thanks.
Welcome aboard! Looks like you're well on your way. Brett provided sound advice: get tools with stiffer bristles. I have a box of "graining tools" that I like to use. Specifically, a pipe brush:
a file cleaner brush (a file card):
and a brush from the welding department at the hardware store:
If the wire brushes you're using look kind of like a toothbrush, you'll scrub a LOT harder and get minimal results:
For those looking for that scratch pen, make sure you buy one that has steel bristles as opposed to fiberglass. This is the one I have:
https://tinyurl.com/y842jybq
With knot holes, I keep a bunch of awls, scribers, or picks handy depending on what I want to achieve. Some came from the beading section of the hobby store (I think they call them "beading picks"). Others from the hardware store and some came from my dentist. I just asked him for his old "scalers" and he gave me a few. I'll also use these tools to scribe some deeper grain lines into boards:
Hope that helps!
This is the result of round two of knot holes with the tools I used and a small drop of AI on them.
I tried to use one of the fiberglass brushes to rough things up years ago. It didn't work very well but worse than that it ended up shedding some real sharp, clear bristles into the skin of my hands. It was from a tool kit I inherited so it may have been very old by the time I got it.
I use the round pipe cleaner style that Bill had in his first example mainly. I got one at Home Depot or Lowes for a few dollars. I have a whole drawer full of wire brushes but that one is the one I use most. Expensive doesn't really equal effectiveness for this tool, I ordered every wire brush Snap-On Tools offered and they were mostly crimped brushes that didn't work every well.
-Steve
Geezerbill
The wood is fantastic. The peel is awesome. It will definitely define your build. Great job
Jim
Another pic to show my forward progress...
Geezerbill