Howdy, Stranger!
It looks like you're new here. If you want to get involved, click one of these buttons!
Categories
- 954 All Categories
- 3 Picture Posting and Resizing
- 60 New Member Introductions
- 100 Off-Topic Forum
- 2 Photography
- 2 Resources
- 18 New Product Information
- 164 The SierraWest Forum
- 11 Brett's Blog
- 120 General News & Ramblings
- 3 Re-Release Information
- 1 Q & A about SierraWest
- 9 What Would You Like to See?
- 405 Builds
- 145 HO Scale Builds
- 185 O Scale Builds
- 58 Finished SW Build Pics
- 11 Miscellaneous Builds
- 185 Techniques
- 19 Working with Wood
- 23 Painting Castings
- 4 Masonry
- 16 Scenery
- 37 Tools and Supplies
- 22 Layout Planning & Building
- 38 Miscellaneous
- 19 Prototype Information
- 18 Reference and Research
Makin' pine trees
This is a brief summary of how I go about making the pine trees for my layout. It is fairly quick and easy. I tend to do a dozen or more at a time and would estimate that it takes 30-60 min/tree. But I've never really timed it. Usually what I do is identify an area on the layout that needs to be forested. I'll estimate the number of big trees needed to fill the area as well as the smaller understory trees....that's the batch I'll work on.
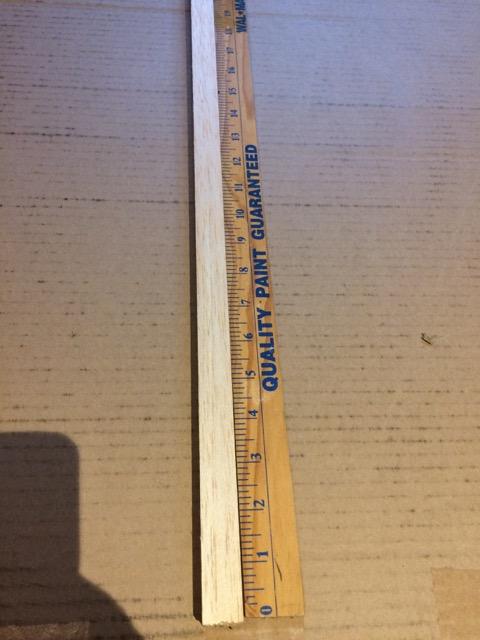
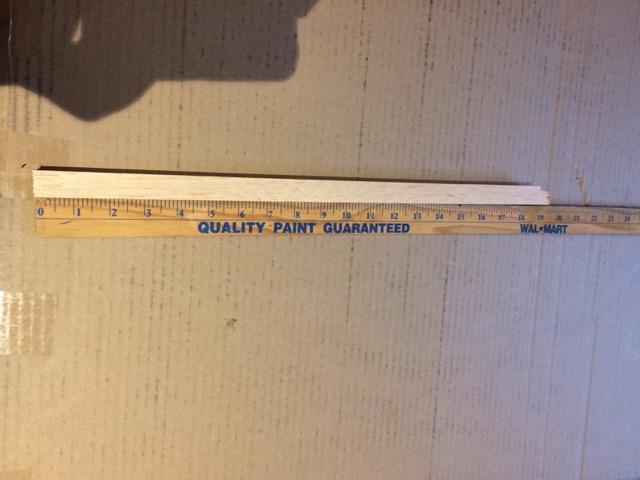
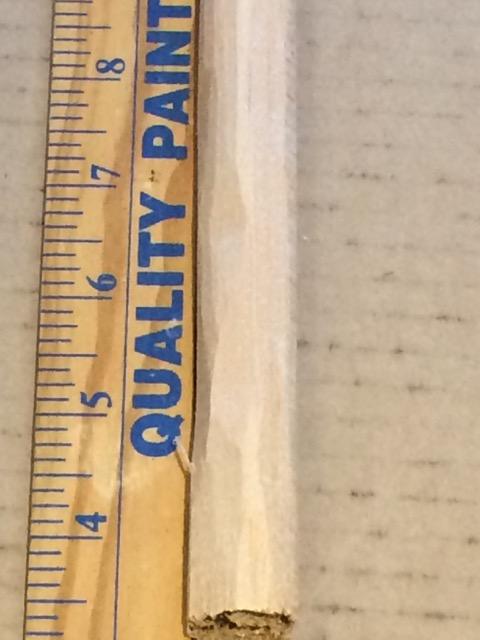
I start with a balsa stick. I forget where I got them, but it was online. They come in a wide variety of thicknesses. This stick is 3/4" so the trunk I will be carving in O scale with be a 3' width by 75' tall.
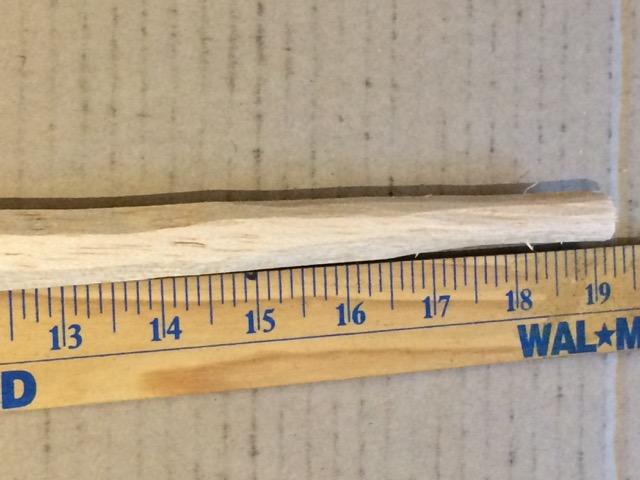
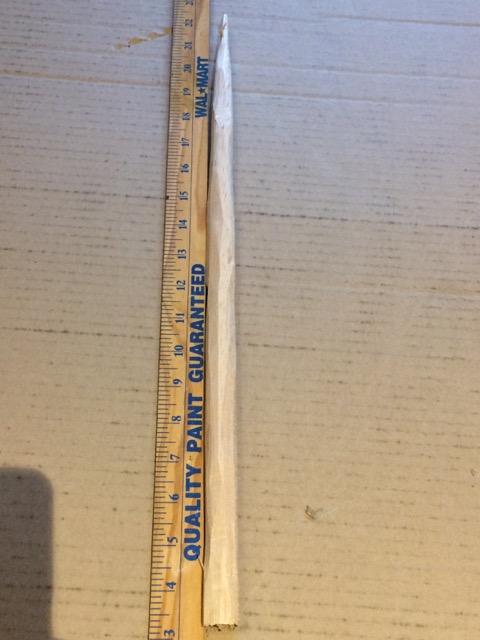
When I start carving, I start at the top of the tree. What I'm looking to achieve is a taper from ground to tip of tree. I whittle off the corners and start moving down. It doesn't have to be perfect, just get the taper and get rid of what looks like flat edges. These pics show the progression from stick to final carving.


Comments
These pics (not the best focus) give an idea of the trunk after being hit by the rasp, then the brush. To cut down (but not eliminate) the fuzzies, I put on a leather glove and rub the trunk.
Note the reverse taper at the base of the trunk of the smaller tree. I'll fix that by cutting it off later. Also note the nail coming out of the trunk of the larger tree. I cut the heads off of finishing nails and use these to hold the trees onto foam while they are being painted, etc.
I start with the trunk by using a pick to put holes for the branches. I start at the bottom and go around the trunk and place 4 or 5 holes. These can be at the same height, but I tend to let mine rise like a barber pole. Decide how wide you want the spread of your foliage to be and break off a branch, dip it in glue and stick it in the hole.
The lowest branches should be the thickest. Continue upwards towards the top. Be careful poking holes at the top of the tree. It's easy to break off the tip or to jab your finger...believe me on this one.
Notice how the branches get smaller as they rise, just like a pine tree. Trim these as necessary. Don't worry if they don't look perfect. This is not the final branch structure.
I did forget 1 thing though. After painting trunk and before putting in branches, I use a black wash on the trunk. about 10:1 with black craft paint.
I use a thick air filter called Naturalaire and cut it into triangles for the large tree and square/circles for the small trees. This should be teased out like you see in the photos.
For the big trees place these pieces on top of your branches. Once in place, use a spray adhesive to hold in place. This WILL make a mess. For the small trees skewer the pieces onto the trunk. Once dry, paint with brown camo paint again.
Now we add the foliage. I use a heavy hold hair spray as the adhesive. Spray the branches from above. Wet them good, then sprinkle your foliage of choice from above letting it cling to the tops of the foliage pads, but not so much on the bottom. My choice of foliage is Scenic Express "farm pasture" with a little bit of dark green short pine needle thrown in. Keep adding until it looks good to you. Hit it hard with the hairspray again, then add just a little bit of "light green fine" ground cover on the top. This gives the highlights on top of the foliage. Hit it with the hairspray again.
I always give a shot of hairspray at the bottom and sprinkle some of the foliage to simulate moss.
The biggest downside to this method is the lack of root structure.
Phil, its a tried and true method and gets good results. I really like the way the caspia gives branch detail. Put some pics of your trees here.
I've tried dowels for smaller trees as well. It eliminates the need for the carving, but is harder to add the bark texture for me.
Geezerbill
Same for you Bill, look forward to seeing what you have done.
Bryan
I love the tree with the "twin trunks" in the middle picture above. How do you make the one on the left appear curved?
The curve is an illusion. When I put the foliage on, I filled it in heavier in the space between the 2 trunks.
I'm on it Carl.
The three largest trees, hard dowel, 1 1/16" dia. I drilled a 1X2 and pounded in small nails, about 3 dozen, so the sharp ends protruded through about 1/8th to 3/16". clamped it down and pulled the dowel trunk along the nails to create the bark texture.
More can be seen on my new thread as soon as I can get it started.
Thanks Bryan for encouraging me to post here. I need to do lots of work to make them more presentable.
Geezerbill
Carl
The first pair of photos show the wire tree and scrap piece front and back. I used 24g floral wire and twisted to the shape I like. I like the stylistic look of bonsai so that's what I will go with. The orange coating is DAP air-dry clay. The tall pine had the twisted branch ends coated with latex. The small white tree was coated entirely with Liquitex modeling paste just to try something different.
I didn't take progress photos of the wiring on these trees so I'll do a 3rd. I want to make a maple tree, possibly with fall colors. I started by putting 2 nails on the edge of a workbench 24" apart (the pine tree was 29" apart and it turned out to be just under 10" tall). I wound an entire spool of 26g floral wire around the nails...250'. Went with smaller gauge wire for ease of twisting. When done, take off the nails and fold in half. Twist the bottom inch or 2 the hold everything together. I used some tin snips to cut through the wire and then wrapped a piece of 24g wire around the base to help hold it together.
Might take me a while to get all of these done but I wanted to post here. If anyone wants to model along, please do.
In pic 1 I have the basic shape of the tree, branches and roots. Add as many or as few as you like. I only use a few branches off the trunk and then fill in the space with secondary branches.
In pic 2 I have started to basic shape of the lowest branch. Just like the trunk, divide and twist until you get down to a single wire.
In pic 3 you can see the first tiny loop. Once you are down to a single wire, roll the wire back on itself and twist into a loop. This will leave you with 2 branch tips eventually. If your loops are big enough, you can fold the loop over itself and twist it into 2 loops giving you 4 branch tips.
Pic 4 is a top down view of the branch. After all tips were looped I started shaping the branch. I like lots of movement in my branches so they got fanned out to give shape. Basically, put a bend in the branch away from an offshoot...if the branch forks to the right, I bend to the left. This gives a very natural look. Then go look for crossing branches and separate them. Look for straight branches and bend them. Keep going until you are satisfied. You can work this part of the process all the way until you coat the wire.
Pic 5 is a side on view. It's a bit difficult to make out, but I also added depth to the branches.
Leave the loops intact for now, this makes the tree much easier to work with.
weren't you going to do a tutorial of your fantastic looking trees?
no offence bryan, yours look great too.
The branches and roots are formed. Take a 360 degree photo shoot to make sure branches are where they supposed to be. What I'm looking for is a triangular foliage shape from every viewing angle, to have the trunk mostly exposed with areas of foliage playing peek-a-boo with the trunk, and well defined foliage pads that blend together.
These 4 photos look very similar but they are the 4 faces of the tree. I met the requirements above from 2 directions and have work to do on the other 2.
Here we are putting the wood on the tree. Materials used are DAS air dry clay and the blue tool seen here. Latex rubber and Liquitex paste are for the branch tips. I like the application of the Liquitex better but the latex gives you flexibility when dry and doesn't leave a big white spot if the paint gets chipped.
Take a small piece of the DAS and flatten it. I use fingers but you can use roller. wrap it around the trunk and press it in. Repeat all the way up the tree and start down the main branches. Don't go too far down the main branches as it is hard to keep them thin enough with the DAS. Aim for a good taper in the trunk from the ground to the tip. Add or take away as needed to get this taper.
You will get areas that need to be "worked". Like where 2 of the bands of DAS come together. Give a light spritz of water and blend the area together using your tool. You can see a before and after blending photo here.
This tree is at a stopping point. This must dry overnight at a minimum to start working again. Likely there will be some minimal spot treatments with the DAS prior to starting the latex.
I didn't put a cavity in this trunk like I did for the owl to live in. To do this, build up a small area of DAS. Poke a hole in it with a toothpick. Ream out the hole a bit with the toothpick and/or the end of a small paint brush. Touch up the edges with your tool. It will look great, I promise.