Howdy, Stranger!
It looks like you're new here. If you want to get involved, click one of these buttons!
Categories
- 991 All Categories
- 3 Picture Posting and Resizing
- 60 New Member Introductions
- 118 Off-Topic Forum
- 2 Photography
- 2 Resources
- 18 New Product Information
- 170 The SierraWest Forum
- 12 Brett's Blog
- 120 General News & Ramblings
- 3 Re-Release Information
- 6 Q & A about SierraWest
- 9 What Would You Like to See?
- 408 Builds
- 146 HO Scale Builds
- 183 O Scale Builds
- 58 Finished SW Build Pics
- 15 Miscellaneous Builds
- 194 Techniques
- 19 Working with Wood
- 23 Painting Castings
- 4 Masonry
- 23 Scenery
- 37 Tools and Supplies
- 22 Layout Planning & Building
- 40 Miscellaneous
- 20 Prototype Information
- 19 Reference and Research
Deer Creek Mine/My new Sierra West Layout
As most of you old timers know, I can't seem to stay in one place for very long. Well, I finally built my retirement home in Georgetown, Texas (just north of Austin), so I'm hoping to stay put for quite some time and build a logging/sawmill free lance layout which will feature many of the Sierra West Kits. In this thread, I will be building the Deer Creek Mine and also posting progress shots of my new layout. I hope you enjoy the journey and as always, I appreciate your comments and critiques.
My "train room" is an upstairs room with a dormer. It's not very large, but the space created by the dormer allowed me to place a killer work area and a staging area. Let's start with my proposed layout which is below.
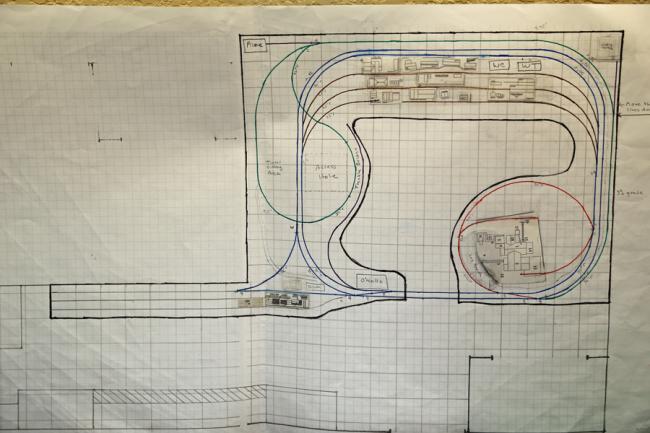
The proposed bench work will be L-girder and I will have a drop-down bridge to access the middle. I'm too old to go under a "duck under."
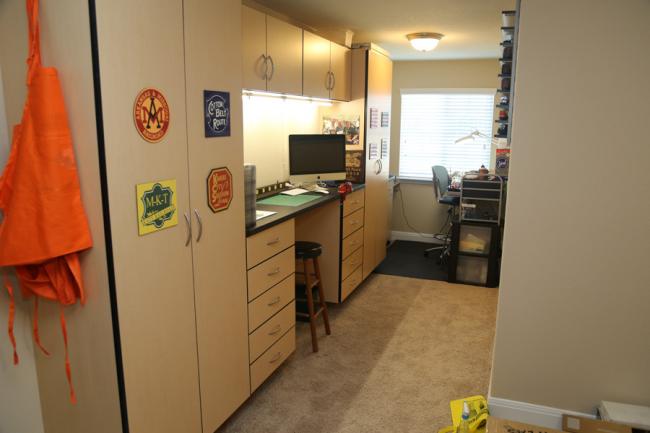
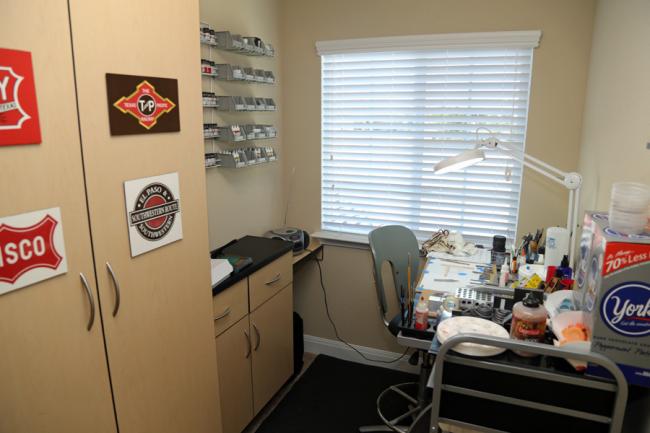
When I was designing the room I thought about putting regular kitchen cabinets in, but 24" was just too big. I found a local company who manufactures garage cabinets and could make any size I needed, so I requested 18" depths for the bottom cabinets and designed a second work center so I didn't have to disturb by Sierra West building station that you will see next. I think the cabinets look great and I adorned them with local railroad signs, and yes, the picture you see is Bill, Ken and me in Boston.
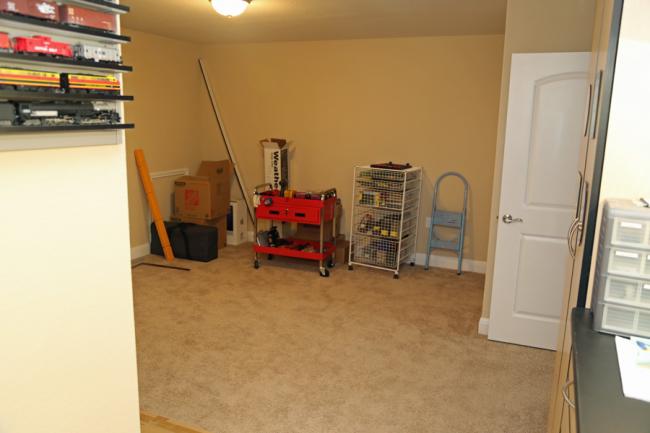
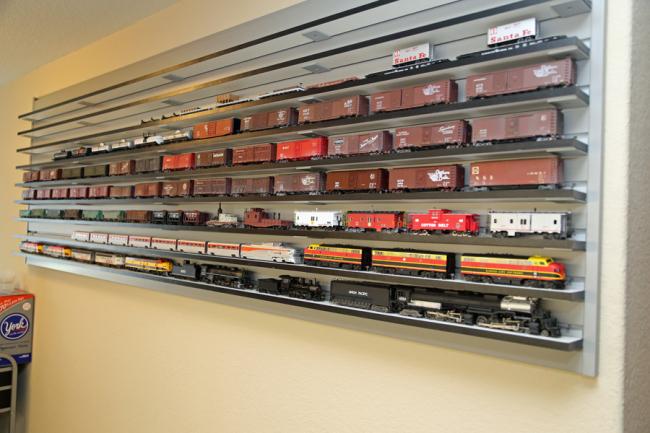
The designer of the cabinets also had a great idea for locomotive and rolling stock storage by the use of a slat wall. We found slat wall brackets that could support small shelves and he made two cuts in the shelves for the wheels. It really turned out great. The staging yard will be right below the shelves for easy on and off.
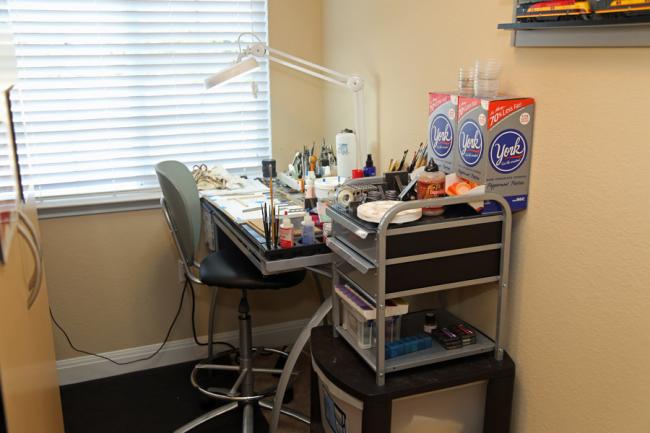
As I mentioned, I have a separate "Sierra West" building station which features a Dick Blick workbench that has a glass top. It's a great space for building Sierra West kits. BTW, my chalks are in the side drawer.
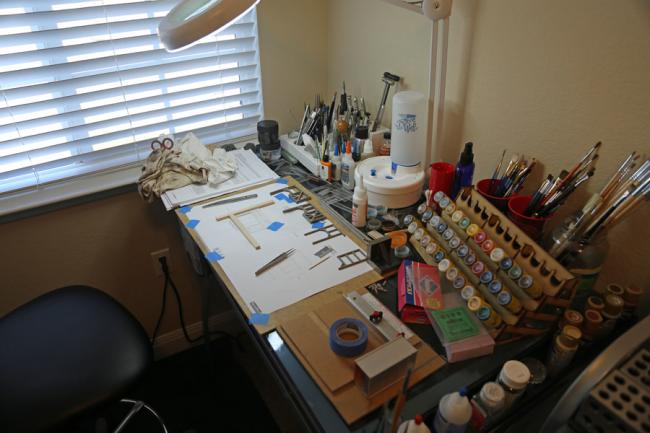
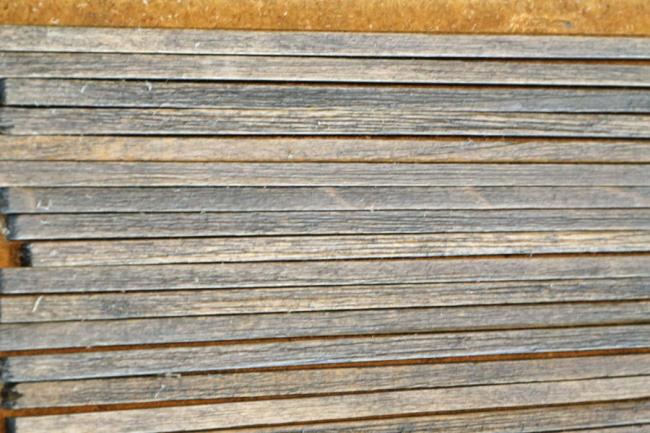
Now, let's get to the Deer Creek Mine. The directions are great, but I'm also following Bill's great build of the same kit. Between the two, I can't go wrong. As for the wood, I decided to go with a more grey, old look. Please ignore the fuzzies. They will be gone when finalize the tipple.
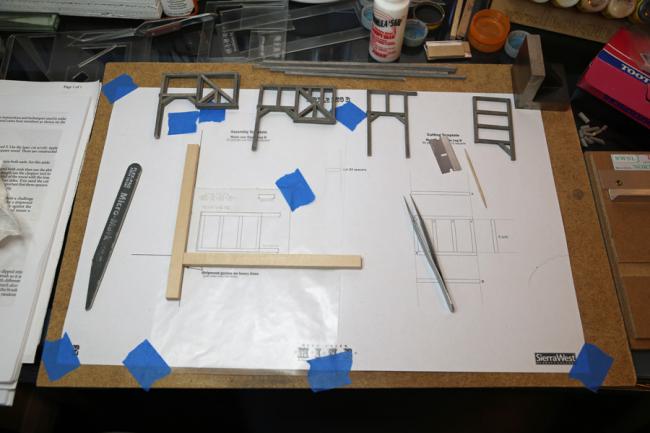
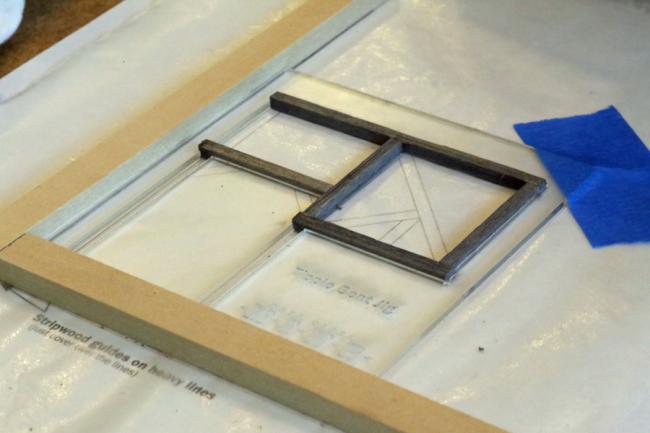
As you know, the first step is to build the tipple bents and it couldn't be easier with Brett's acrylic jigs. One word of caution. The jigs are very fragile and you can break them pretty easily. I did. However, nothing that a little CA couldn't cure.
That's all for now. This is going to be a slow build since I'm building the layout at the same time. I will post progress on both fronts from time to time.
Phil
My "train room" is an upstairs room with a dormer. It's not very large, but the space created by the dormer allowed me to place a killer work area and a staging area. Let's start with my proposed layout which is below.

The proposed bench work will be L-girder and I will have a drop-down bridge to access the middle. I'm too old to go under a "duck under."
When I was designing the room I thought about putting regular kitchen cabinets in, but 24" was just too big. I found a local company who manufactures garage cabinets and could make any size I needed, so I requested 18" depths for the bottom cabinets and designed a second work center so I didn't have to disturb by Sierra West building station that you will see next. I think the cabinets look great and I adorned them with local railroad signs, and yes, the picture you see is Bill, Ken and me in Boston.


The designer of the cabinets also had a great idea for locomotive and rolling stock storage by the use of a slat wall. We found slat wall brackets that could support small shelves and he made two cuts in the shelves for the wheels. It really turned out great. The staging yard will be right below the shelves for easy on and off.

As I mentioned, I have a separate "Sierra West" building station which features a Dick Blick workbench that has a glass top. It's a great space for building Sierra West kits. BTW, my chalks are in the side drawer.


Now, let's get to the Deer Creek Mine. The directions are great, but I'm also following Bill's great build of the same kit. Between the two, I can't go wrong. As for the wood, I decided to go with a more grey, old look. Please ignore the fuzzies. They will be gone when finalize the tipple.

As you know, the first step is to build the tipple bents and it couldn't be easier with Brett's acrylic jigs. One word of caution. The jigs are very fragile and you can break them pretty easily. I did. However, nothing that a little CA couldn't cure.


That's all for now. This is going to be a slow build since I'm building the layout at the same time. I will post progress on both fronts from time to time.
Phil


Comments
Good start to the build buddy.
You've got a great looking hobby space! Nothing like a spacious comfortable area for modeling.
Can you tell me where you found the slat wall brackets?
Carl
Jerry
Carl
I haven't made any progress on the mine, but I have made significant progress on my layout. As you may recall my proposed layout (see above) will feature mostly Sierra West kits. Therefore, the layout has to be as good as Brett's kits. I used Model Railroader "Basic Model Railroad Bench work" as a reference for my L-girder layout. The first step is to develop a scale drawing of my proposed bench work.
When building an L-girder layout, you're really building tables and joining them together. I also added adjustable feet to the legs. It all starts with the first table:
Followed by another table:
Followed by another table and so on:
I am going to have a drop down bridge and I didn't want there to be any difference in height from one span to another, so I created one girder, put it in place, then put the legs and bracing in place, and then I cut out where the bridge will be.
Next was the yard, which will be around the corner from the main layout.
Before I got too far, I needed lights. With the help of my brother-in-law, who is an electrician, I put in track lighting. He gave me a great suggestion. Buy the incandescent light kits that accommodate R20 bulbs and then add LED bulbs. It's cheaper than the LED kits. Boy, do I have the lighting now.
I've now progressed to where I am adding the joists. Before I put them on the layout, I use my drill press to punch holes for the electrical.
That's all for now. I'll update as I add more joists and lay down the plywood. Thanks for following my build. Phil
I know it's sacrilegious to say something like this here but depending on the structure's position you might skip detailing the parts that can't be seen to make more time for the parts of the layout that can be seen. I think in building a layout the ultra detail that's possible
can be an empty effort if it can't be appreciated. In your plan it looks like the sawmill will be appreciated from all sides but the railroad camp might not be.
It looks like you got all the sawdust out of the carpet or your cutting wood in another room and bringing it into this one.
Mitch
Carl
Mitch, you state the dilemma that I'm facing. When you put the kit in the layout, do you totally detail out all sides. As for the saw dust, I do most of my cutting in the garage, but there is still some cutting in the train room. A good vacuum cleaner is a must.
Carl, I'm going with a photo backdrop from my good friend Joey Ricard at Trackside Scenery. I want a lot of trees and I plan to place trees in front of the backdrop so you can't tell where the photo stops and the real trees begin.
Phil
Geezerbill
This step is probably the hardest because once done, it's hard to change. Therefore you want to be right. I have a buddy Burt who taught me how to envision the track plan by using various curves made out of hardboard. It really helps. You will see my progression below.
I made a lot of progress, but I'm out of plywood, so it's back to Home Depot for more. Thanks for checking in on my build. Phil
I used a real thin one inch wide peace of wood and it will flex to the curves and works well if you can not get it to make a round curve then it is to tight. I got this tip from Dick Ewell he has the Hoosic Valley RR. The strip was about 15 ft long and it gives you a true look at your up coming track work. I made a big mistake by not setting the structures in place first.
Just my 2$ worth
Carl
Have you kicked around the idea of using splines for the subroadbed? I made mine out of Masonite strips that I laminated together. You get nice smooth curves like Carl was talking about abov and it makes it easy to change and adjust elevation.
These are lousy pictures, but here's a look at how I used them on my layout:
Here's a link to a S-B-S on spline construction:
http://s145079212.onlinehome.us/rr/howto/splines/
Geezerbill
The next phase is the layout of my train yard as it leads to the drop-down bridge. As you can see, I carefully laid it out using pins to make sure everything fit correctly. Also, to test my track and turnouts while I'm under construction, I use an old DC transformer with alligator clips to temporarily power the track to test it. It works really great.
Thanks for checking in on my progress. Happy New Year!!
Phil
Next, I'm moving on to Section 2, which is the elevated track that will lead to my timber cutting area. On the way up the mountain you will run into the Logging and Tractor Repair, the Woodcutter's Shack, the Backwoods Water Tank and Storage Shed, as well as the mine.
Phil