Howdy, Stranger!
It looks like you're new here. If you want to get involved, click one of these buttons!
Categories
- 954 All Categories
- 3 Picture Posting and Resizing
- 60 New Member Introductions
- 100 Off-Topic Forum
- 2 Photography
- 2 Resources
- 18 New Product Information
- 164 The SierraWest Forum
- 11 Brett's Blog
- 120 General News & Ramblings
- 3 Re-Release Information
- 1 Q & A about SierraWest
- 9 What Would You Like to See?
- 405 Builds
- 145 HO Scale Builds
- 185 O Scale Builds
- 58 Finished SW Build Pics
- 11 Miscellaneous Builds
- 185 Techniques
- 19 Working with Wood
- 23 Painting Castings
- 4 Masonry
- 16 Scenery
- 37 Tools and Supplies
- 22 Layout Planning & Building
- 38 Miscellaneous
- 19 Prototype Information
- 18 Reference and Research
Lighting Up O'Neills (1:87)
Over the course of my official forum build of O'Neills Fabrication, the issue of lighting came up several times. With the Welding Shop consisting of a highly detail interior with wonderful old rustic open doors, I decided to provide some general lighting to allow these details to be viewed once the roof was permanently attached. To regress a bit...
Lighting of both the exterior and interior of scale models has been perfected by many modelers and materials to execute a complete lighting plan of any model is readily available. A simple search on the Internet will provide ample information and sources of materials. I possess a very rudimentary knowledge of this type of lighting but have been looking into it more and more and as I do, I have become more intrigued with the finer points of this process. There are many modelers here on the forum much more skilled, for now!, than I am (Alan!) at lighting structures. It is my hope that this initial brief thread will motivate others to get involved with posting discussions regarding this exciting aspect of working up SierraWest Scale Model Kits.
Back to my O'Neills Welding Shop. I wanted a very simple and general lighting of the interior to allow the details to be perused through the open doors once the diorama was compete. I did not want any of the wiring or lights to be seen, just a general warm overall illumination of the inside of the shop. I found a simple 2 Light LED Kit that came complete with wiring, on/off switch, Coin Style Lithium Battery and Holder all for $6.80 (send me a PM for info. on this kit if desired)
I decided on mounting the two LEDs from the rafters near the gable peak at each end of the shop. I drilled a small hole through the floor in the corner of the shop that could not bee seen from either open door. I positioned the Welding Shop exactly where it was going to be planted, and ran a stiff wire down through the hole and into the foam diorama base. I removed the shop and drilled a hole through the diorama base to allow the wires to pass through. A router was used to make a recessed area on the bottom side of the diorama base to accommodate the switch and battery assembly. I then installed the ridge board and the first set of rafters at each end of the roof. I reinforced these two sets of rafters with epoxy to strengthen them in lieu of placing cross boards to attach the LEDs to. The LEDs were then epoxied to the cross boards and the wire run down the side of the shop and down the pre-drilled hole (see figure 1 and 2). The wires were fed down through the hole and out the bottom of the base and the Welding Shop permanently planted in place.
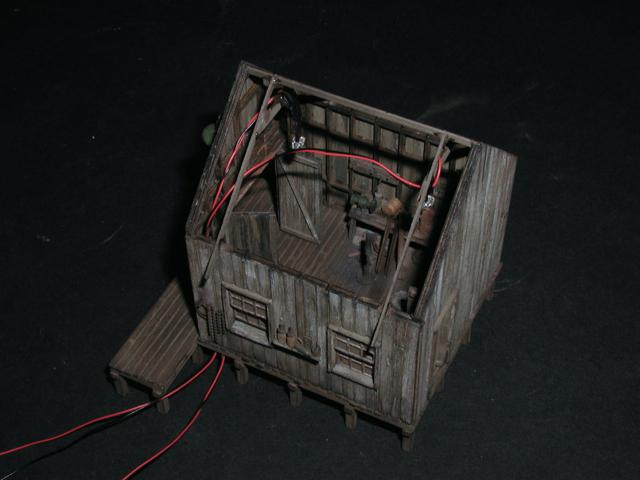
(Figure 1) Finished wiring and LED installation. The wires running down the corner of the shop were painted flat brown despite them not be visible just in case some "rubber neckers" can get a glimpse!
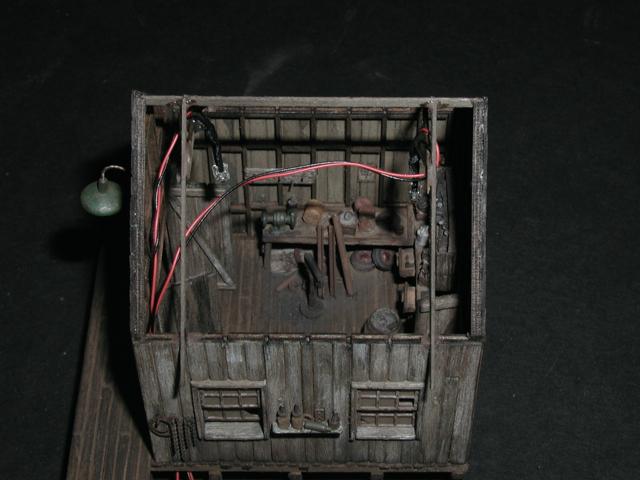
(Figure 2) Note how the rafters and cross pieces are reinforced with epoxy. I painted the Epoxy brown as well for the same reason as above!
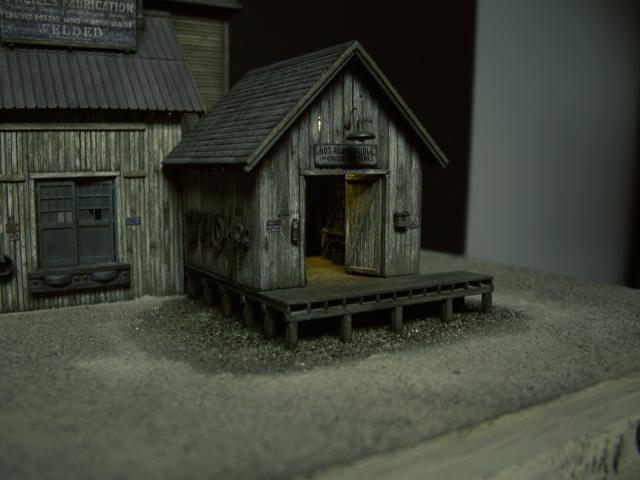
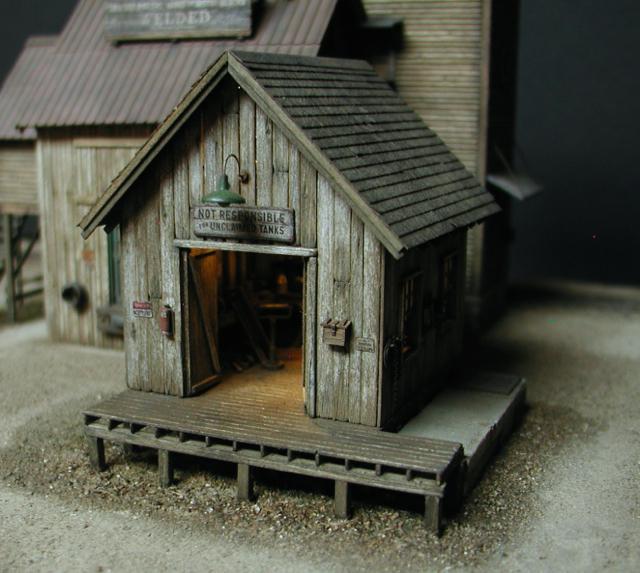
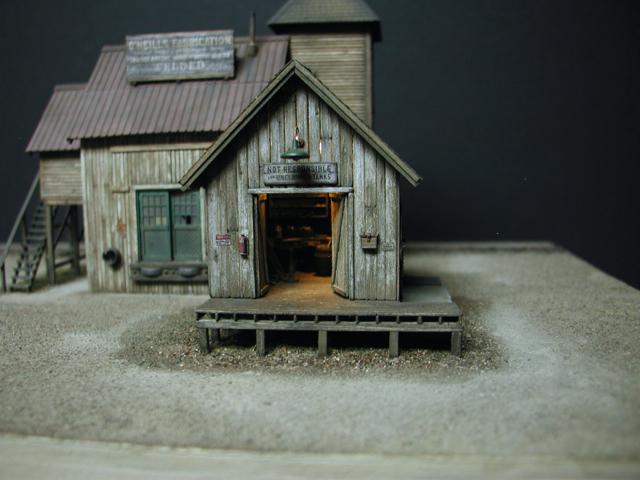
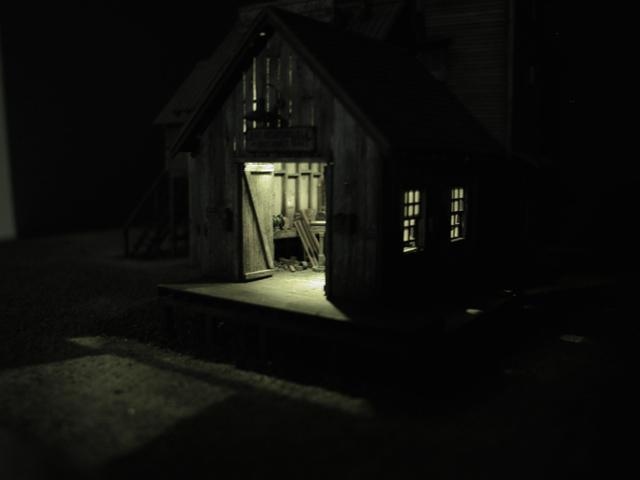
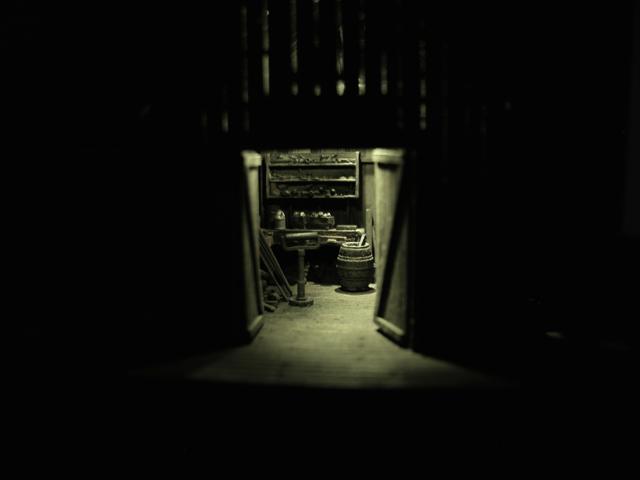
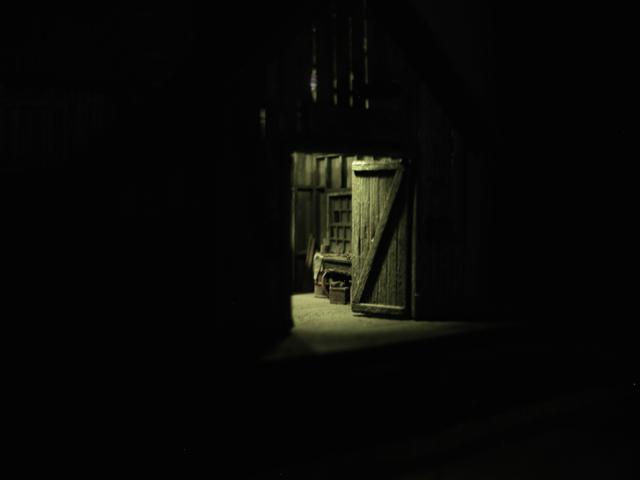
Very quick and simple and my goal of having some general lighting for the shop has been accomplished. I had a difficult time getting good pictures of the lighting but I think you can get the idea...
Lighting of both the exterior and interior of scale models has been perfected by many modelers and materials to execute a complete lighting plan of any model is readily available. A simple search on the Internet will provide ample information and sources of materials. I possess a very rudimentary knowledge of this type of lighting but have been looking into it more and more and as I do, I have become more intrigued with the finer points of this process. There are many modelers here on the forum much more skilled, for now!, than I am (Alan!) at lighting structures. It is my hope that this initial brief thread will motivate others to get involved with posting discussions regarding this exciting aspect of working up SierraWest Scale Model Kits.
Back to my O'Neills Welding Shop. I wanted a very simple and general lighting of the interior to allow the details to be perused through the open doors once the diorama was compete. I did not want any of the wiring or lights to be seen, just a general warm overall illumination of the inside of the shop. I found a simple 2 Light LED Kit that came complete with wiring, on/off switch, Coin Style Lithium Battery and Holder all for $6.80 (send me a PM for info. on this kit if desired)
I decided on mounting the two LEDs from the rafters near the gable peak at each end of the shop. I drilled a small hole through the floor in the corner of the shop that could not bee seen from either open door. I positioned the Welding Shop exactly where it was going to be planted, and ran a stiff wire down through the hole and into the foam diorama base. I removed the shop and drilled a hole through the diorama base to allow the wires to pass through. A router was used to make a recessed area on the bottom side of the diorama base to accommodate the switch and battery assembly. I then installed the ridge board and the first set of rafters at each end of the roof. I reinforced these two sets of rafters with epoxy to strengthen them in lieu of placing cross boards to attach the LEDs to. The LEDs were then epoxied to the cross boards and the wire run down the side of the shop and down the pre-drilled hole (see figure 1 and 2). The wires were fed down through the hole and out the bottom of the base and the Welding Shop permanently planted in place.

(Figure 1) Finished wiring and LED installation. The wires running down the corner of the shop were painted flat brown despite them not be visible just in case some "rubber neckers" can get a glimpse!

(Figure 2) Note how the rafters and cross pieces are reinforced with epoxy. I painted the Epoxy brown as well for the same reason as above!
Very quick and simple and my goal of having some general lighting for the shop has been accomplished. I had a difficult time getting good pictures of the lighting but I think you can get the idea...


Comments
--Paul
I'll just call you Mr. Baseball for now!...appreciate you checking it out and thanks for the nice comment. Really nice to see you posting here on the forum and welcome aboard. You are so right!...O'Neills would be so ripe for a complete in and out lighting project and I hope someone takes it on. However, I didn't pursue it as I'm doing the official forum build and that kind of lighting would take some time and I didn't want to hold up the progress on the build and is a bit outside the goal of this project...for now. In addition, I'm in the process of researching and learning the finer aspects of lighting with the goal of lighting my builds from here on out, heck I may even do another O'Neills and flesh it out with a full lighting package!...the kit is that good...
Phil, the thinner wire would be good for all applications but for this basic light up project it was fine. Right, this kit was just a ready made assembly and very reasonably priced, kind of a "plug-and-play". The company you are referring to is top notch and will be and is my source for information and future lighting projects. As an example, the kit I used would not be suitable for any lights that are visible. The LEDs are just too big.
Thanks much Wes...PM outbound my man!