Howdy, Stranger!
It looks like you're new here. If you want to get involved, click one of these buttons!
Categories
- 997 All Categories
- 3 Picture Posting and Resizing
- 60 New Member Introductions
- 118 Off-Topic Forum
- 2 Photography
- 2 Resources
- 18 New Product Information
- 171 The SierraWest Forum
- 12 Brett's Blog
- 120 General News & Ramblings
- 3 Re-Release Information
- 6 Q & A about SierraWest
- 9 What Would You Like to See?
- 412 Builds
- 146 HO Scale Builds
- 183 O Scale Builds
- 62 Finished SW Build Pics
- 15 Miscellaneous Builds
- 194 Techniques
- 19 Working with Wood
- 23 Painting Castings
- 4 Masonry
- 23 Scenery
- 37 Tools and Supplies
- 22 Layout Planning & Building
- 40 Miscellaneous
- 21 Prototype Information
- 20 Reference and Research
Railroad Camp Truck Repair Shop
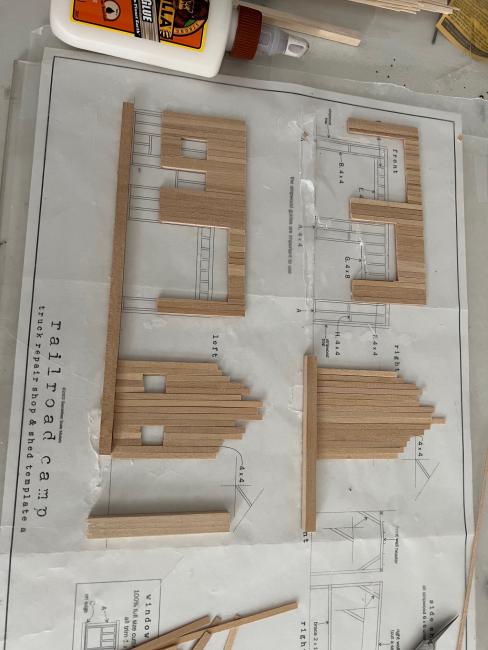
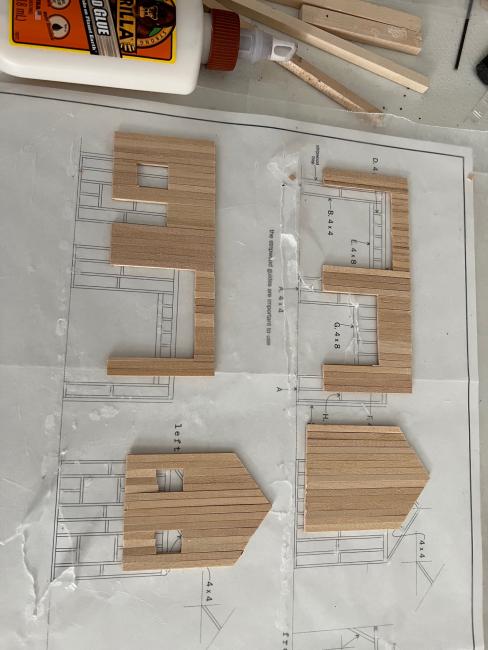
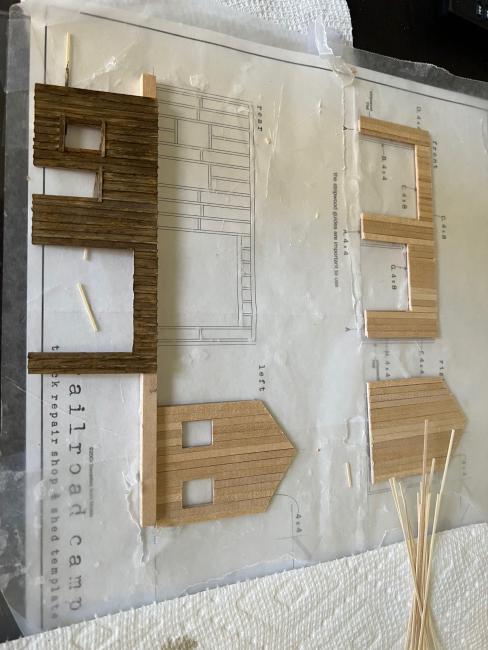
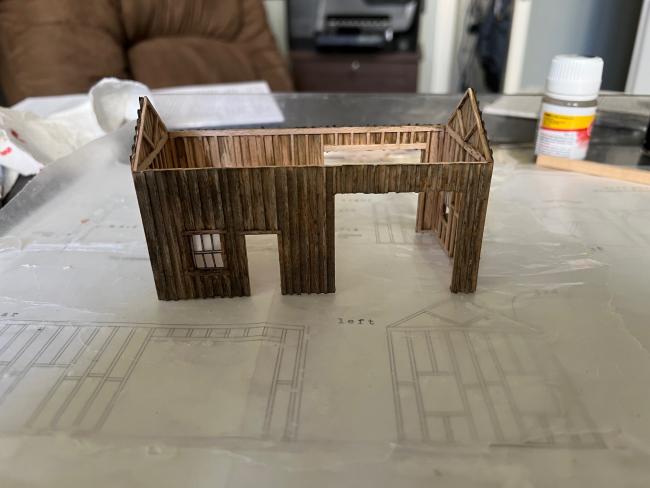
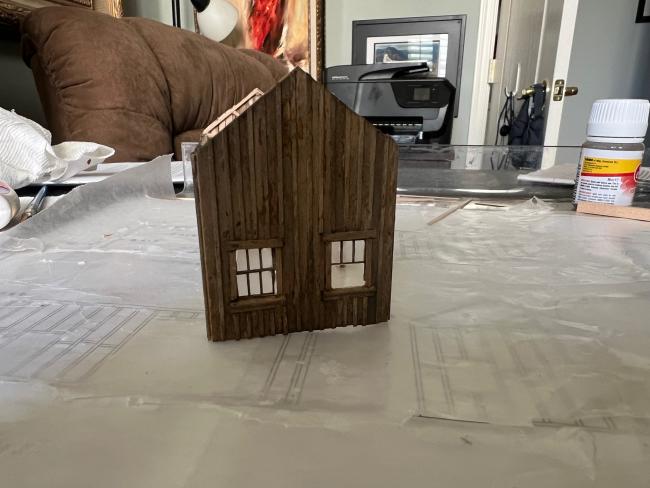
Thought I'd make a contribution and show work in progress. Assembling framing over wax paper on templates isn't too difficult, nor is the first layer of siding. I did find the work on battens to be challenging due to the size and needing to align then properly, while applying glue. I had some problems with window frames breaking. This may in part be due to the fragile size though most likely the material is somewhat brittle as the kit was made several years ago. The kit was complete when I bought it from a hobby shop a few years back but don't know how long ago it was originally purchased. For weathering I used a mix of weathering and alcohol and am reasonably pleased with the result. I'm planning to continue with this building scene (side shed, roof and details) before moving on to the Boiler and Welding Shop.
Craig
Craig


Comments
Jerry
Did you not get the instruction manual in the second hand kit you bought?
I was confused as you had assembled the walls before colouring the wood, and that process is not in any of the manuals.
That is why I asked if you had the manual or not.
Now that you mentioned the floquil stains etc I realize that this is the original HO version, I also looked closer and saw the text font on the templates.
It is coming together great and I cant wait to see your next updates on this awesome kit, keep posting progress pics as you go for us all to enjoy your work.
If the dirt when dry is too dark, you can spread some lighter dirt on top. Make sure your glue mix is not too heavy on the glue side as this can further cause undue darkening. You can also lighten the dry dirt with lighter shades of pigments or dry, finely sifted, real dirt. Do this dry and with an old brush. You don't need to re-wet this application with the "wet water" if applied in a light application. By the time you lighten strategic areas like pathways, add ground covers and other materials she should look fine.
Here is a picture of my most used real dirt color. Note that it's very light and will darken a bit once applied.
PS. I use Woodland Scenics "Scenic Cement" exclusively and it seems to be the right mix for me and you don't have to guess what the ratios of glue to water were last time-- and no scary misting! It's expensive for what it is but you will only use maybe 1/4 bottle on a diorama of this size.