Howdy, Stranger!
It looks like you're new here. If you want to get involved, click one of these buttons!
Categories
- 954 All Categories
- 3 Picture Posting and Resizing
- 60 New Member Introductions
- 100 Off-Topic Forum
- 2 Photography
- 2 Resources
- 18 New Product Information
- 164 The SierraWest Forum
- 11 Brett's Blog
- 120 General News & Ramblings
- 3 Re-Release Information
- 1 Q & A about SierraWest
- 9 What Would You Like to See?
- 405 Builds
- 145 HO Scale Builds
- 185 O Scale Builds
- 58 Finished SW Build Pics
- 11 Miscellaneous Builds
- 185 Techniques
- 19 Working with Wood
- 23 Painting Castings
- 4 Masonry
- 16 Scenery
- 37 Tools and Supplies
- 22 Layout Planning & Building
- 38 Miscellaneous
- 19 Prototype Information
- 18 Reference and Research
Logging Camp Diorama HO Scale
Hope everyone's summer is going well. Having finally finished a non-SWSM kit that took forever, I'm finally ready to take the plunge and get cracking on the Logging Camp Diorama. As most of you already know, this is made up of four kits: Logging Camp Main Street and Essentials, the Loco and Service Shops and the Donkey Repair Yard. Here is the layout plan from the site
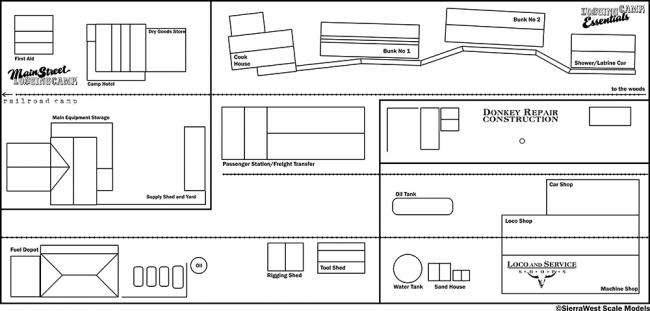
I plan on laying the buildings all out and I may reorder the buildings a bit and re-size the overall diorama to be a bit bigger than the 2' x 4' layout just to give things a bit more room.
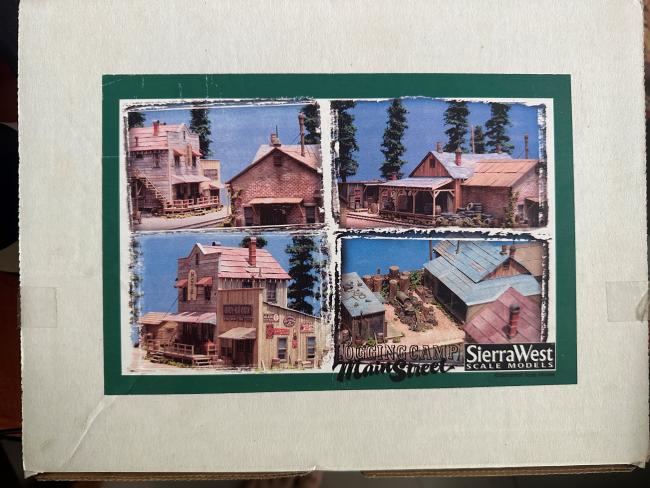
First up is Logging Camp Main Street which was released in 2007 when I was a freshman in college. So needless to say, even if I knew about SWSM and Brett had priced the kit at $15, I would not have been able to take part in the original run. Was lucky enough to get my hands on a mint condition kit through the wonders of the internet.
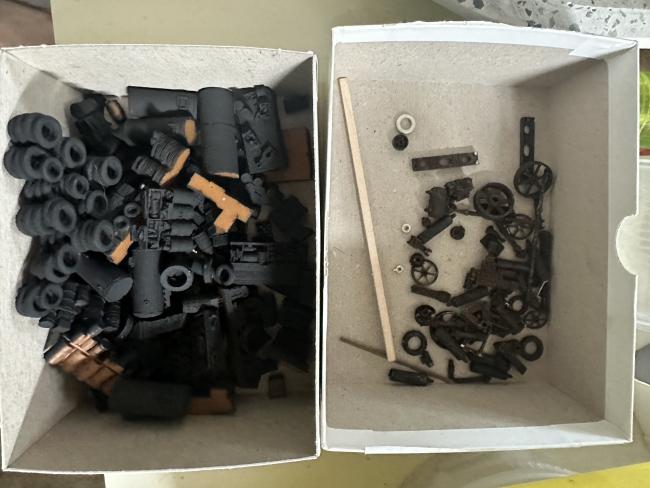
As usual with Brett's kits, there are a boatload of castings. This run it was all resin and white metal-- no 3d printing just yet! I have already primed them.
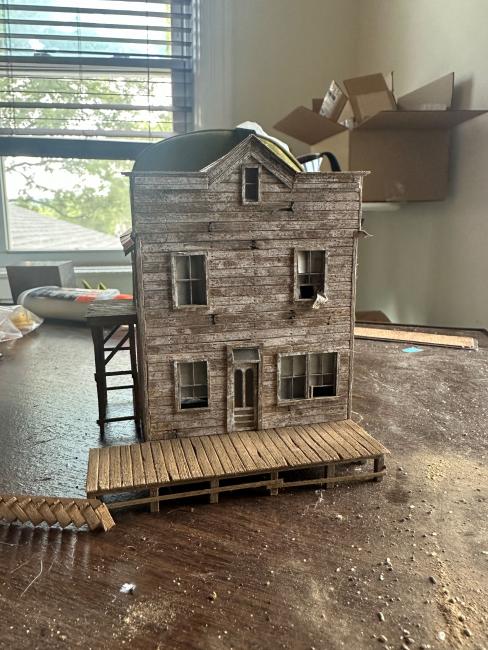
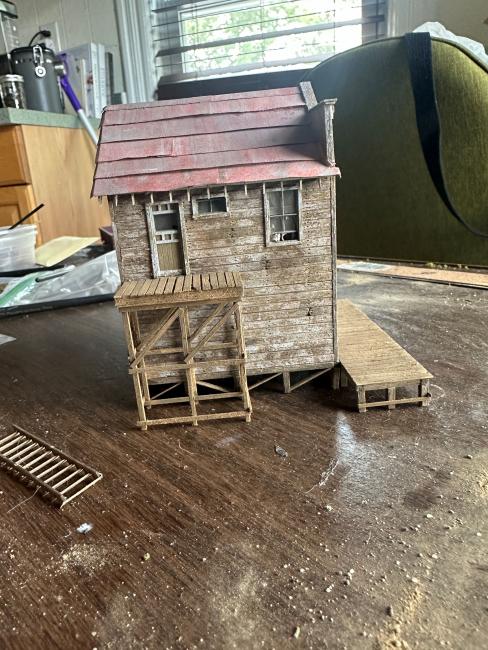
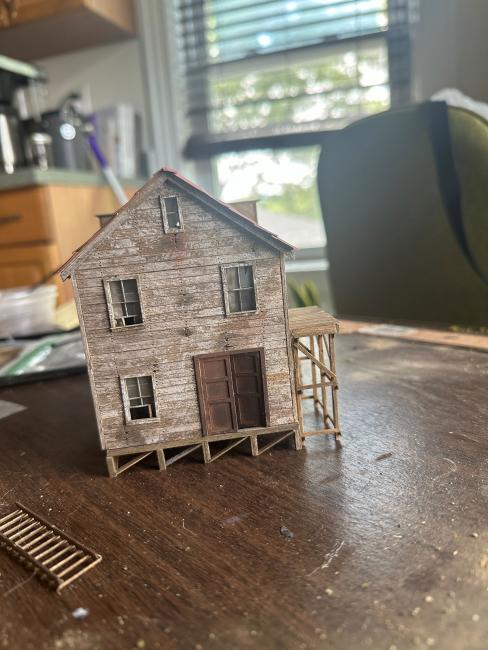
Summer has been pretty busy but have made good progress on the Hotel portion which is the first building. Some pics attached below. Will try to take a few more in progress shots as I move along. As always, any feedback and constructive criticism is welcome.
My thought here is to model the logging camp on upstate NY, in the Adirondacks, which is about 2 hours north of me. So have had many a summer and winter visit. That being said, I am trying to get a more "wet" look to the wood so more brown than gray. Timeframe is the 1920s-30s so thought is no one is really visiting the site any longer and hotel has started to fall into disrepair. The other buildings will still be in good order as it's an active camp but the end is in sight. Doing some research, the camps in NY really did die out pretty early as they were obviously logged extensively from colonial times on. So this timeline may be a bit of a stretch.
Thanks everyone for checking in. Have been so inspired by some of the builds of these four kits on the forum and I am really looking forward to the journey ahead.

I plan on laying the buildings all out and I may reorder the buildings a bit and re-size the overall diorama to be a bit bigger than the 2' x 4' layout just to give things a bit more room.
First up is Logging Camp Main Street which was released in 2007 when I was a freshman in college. So needless to say, even if I knew about SWSM and Brett had priced the kit at $15, I would not have been able to take part in the original run. Was lucky enough to get my hands on a mint condition kit through the wonders of the internet.
As usual with Brett's kits, there are a boatload of castings. This run it was all resin and white metal-- no 3d printing just yet! I have already primed them.
Summer has been pretty busy but have made good progress on the Hotel portion which is the first building. Some pics attached below. Will try to take a few more in progress shots as I move along. As always, any feedback and constructive criticism is welcome.
My thought here is to model the logging camp on upstate NY, in the Adirondacks, which is about 2 hours north of me. So have had many a summer and winter visit. That being said, I am trying to get a more "wet" look to the wood so more brown than gray. Timeframe is the 1920s-30s so thought is no one is really visiting the site any longer and hotel has started to fall into disrepair. The other buildings will still be in good order as it's an active camp but the end is in sight. Doing some research, the camps in NY really did die out pretty early as they were obviously logged extensively from colonial times on. So this timeline may be a bit of a stretch.
Thanks everyone for checking in. Have been so inspired by some of the builds of these four kits on the forum and I am really looking forward to the journey ahead.

Comments
Hey Al. Yes it’s been slow in here. Summer time is in full swing so think it will get busier as the weather cools off. I had to buy essentials from a guy in Australia…not many of those around.
Forgot that layout diagram even existed... Oh the memories of the last thirty years. Crazy.
The layout diagram is still there on your website , tucked away in the Logging Camp Essentials
Section.
Nick
Got one wall of the Dry Goods store done to test color and overall look-- going for still in good use but showing age. And for that more Northeastern "wetter" look to the wood. Used a combination of chalk and oils and am pretty happy with the results. Bottom right corner intended to show water damage from the pipe on the roof (still need to add some rough interior framing behind it) and will carry that over to the corner of the roof as well. If it doesn't look good when in place, can always throw a casting in front of it.
(Note: none of these are mine. That is how I am able to find the time and money for these kits...)
Finished up the Hotel and Dry Good store. Messed up the hotel sign a bit so I am going to leave the mounting post up on the wall and have the sign on the ground--maybe up on sawhorses like it is being fixed?
The right side with all the signs and piping on the hotel is so cool.
As always with Brett's kits, the instructions are excellent and easy to follow but allow a lot of room for personal touches.
The chimneys look a little wonky so will go to fix those.
Onto the Equipment Warehouse which, with the brick walls and sagging roof is really the star of the show for this kit. These wide boards (to be painted red) are perfect for adding a lot of character and weathering.
Woke up this morning and it was in the 40s! So prime modeling weather is incoming.
Hope you all are well and thanks for checking in.
Ken going to make it a point to attend next year. Maybe even bring something to show. Would be so cool to meet some folks from the forum and see the amazing work you all produce in person.
Unfortunately my boss doesn’t appreciate our hobby/obsession and won’t let me take more time off so soon!
Jerry
For the barn walls, I grained the wood and stained it with the new method of alcohol and chalk. Then I damp brushed it with a mix of cheap acrylics at the color I was going for. Brushed it with a steel brush again and then attacked it with some fine steel wool to take some of the paint off in certain areas. Then you have to stain it again (I used oils and mineral spirits to avoid messing up the acrylic) to cover any bare wood. Time consuming but fun and the layering helps bring out some depth, I think.
The three walls of the old office came apart in my hands when i moved it for the photos. Oh well, I want to replace one of the corner trim pieces anyway...
The brick walls I primed matte black. Then sponged on some bricky colors randomly. I used joint compound for the mortar and then brushed the walls with a lightly damp foam brush. That took most of the color off the bricks, unfortunately so I went back and dry brushed some redder brick color in certain areas. I think it turned out ok. The concrete patches and lintels were painted with an aged concrete color and weathered with oils. Final weathering tbd once everything is in place. On to the brick addition corrugated roof. I hate doing corrugated so next challenge is to get that to look good. Open to suggestions! I may try the echtant as I will need to use that on the Sawmill later on and this roof is much smaller.
Now that the fall weather is finally here, I hope to get this one in the books at a quicker pace. Thanks for looking.
After struggling with the corrugated, I did decide to redo them. These were primed and then only chalk and alcohol were used to color. Pretty happy with the look and plan to use more often as I never liked how they painted.
Shingles underneath the tarpaper were done out of scale 1 x 6s. Easier than it sounds! Again, plan on doing this going forward.
Final two pics of the other sides. A great structure well designed as always from Brett. FInal weathering and tweaking to be done once in situ. I THINK that awning looks crooked from the angle of the photo but will confirm!
Thanks as always for checking in. Feel free to comment if there is anything I should change or take a second look at. As we all know, the camera never lies!
Just a hope, Ken— no rushing here. Would rather take the time to get it as right as I can than power through it for some arbitrary date!