Howdy, Stranger!
It looks like you're new here. If you want to get involved, click one of these buttons!
Categories
- 956 All Categories
- 3 Picture Posting and Resizing
- 60 New Member Introductions
- 101 Off-Topic Forum
- 2 Photography
- 2 Resources
- 18 New Product Information
- 165 The SierraWest Forum
- 12 Brett's Blog
- 120 General News & Ramblings
- 3 Re-Release Information
- 1 Q & A about SierraWest
- 9 What Would You Like to See?
- 405 Builds
- 145 HO Scale Builds
- 185 O Scale Builds
- 58 Finished SW Build Pics
- 11 Miscellaneous Builds
- 185 Techniques
- 19 Working with Wood
- 23 Painting Castings
- 4 Masonry
- 16 Scenery
- 37 Tools and Supplies
- 22 Layout Planning & Building
- 38 Miscellaneous
- 19 Prototype Information
- 18 Reference and Research
kebmo's water tower and handcart repair shed
well, i dillydallied around for the longest time trying to finish up the logging and tractor repair shed build. the building is finished, but i still have the details to place and the roof to attach. i bailed on the lighting.
anyway, i've been itching to get started on this one since it was first released. i've been through the manual a couple of times, and i started messing around with the details.
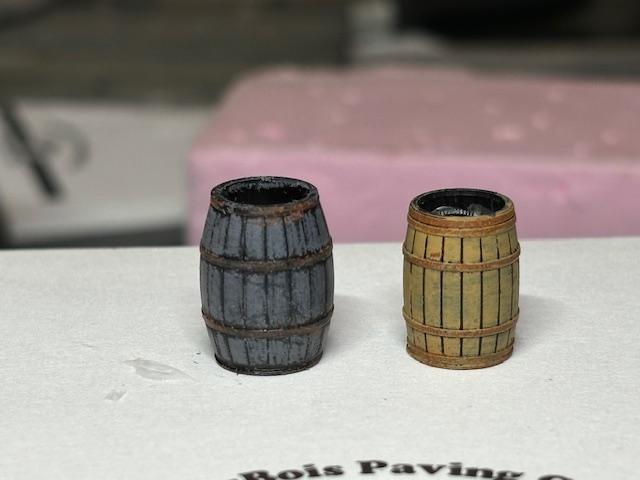
i did a bunch of details, but today i decided to tackle the wood barrels. the one on the right is the first wooden barrel that i've done that i'm remotely happy with. the one on the left is gonna be buried among a bunch of other details and i wanted an aged barrel, so i experimented with a couple of prismacolor pencils. since we have ALL the colors in this house, i think i should seriously make them a part of my arsenal..


Comments
i haven't weathered either of them yet. i'm gonna wait to do that until it's time to plant them on the diorama.
Terry
Jerry
The siding goes on first and then the tarpaper is cut to fit between the wood framing?
Terry
T
Jerry
i haven't had a chance to take a picture of the other side of the wall yet.
terry
Great work and photos. i especially like how the second photo helps to see more of the details such as the drill press, the cabinet, the overhead light and the details placed on the inset shelves,
Later, Dave S. Tucson, AZ
Jerry
So well done with those beautiful details, but it is your work with them that makes your scene look so good.
because i just didn't feel like messing with plaster this weekend, i decided to skip ahead and tackle the floors.
the rails are just sitting there. i wanted to see how they looked in situ.
i'm pretty happy with the results.
Jerry
it reminds me of an old storefront that had been converted to a library. a very small library. the floor was really close to this in color, and as you perused the shelves, the floor would creak along with you as you searched and searched for another hardy boy book that you haven't read.
ah, youth.....