Howdy, Stranger!
It looks like you're new here. If you want to get involved, click one of these buttons!
Categories
- 954 All Categories
- 3 Picture Posting and Resizing
- 60 New Member Introductions
- 100 Off-Topic Forum
- 2 Photography
- 2 Resources
- 18 New Product Information
- 164 The SierraWest Forum
- 11 Brett's Blog
- 120 General News & Ramblings
- 3 Re-Release Information
- 1 Q & A about SierraWest
- 9 What Would You Like to See?
- 405 Builds
- 145 HO Scale Builds
- 185 O Scale Builds
- 58 Finished SW Build Pics
- 11 Miscellaneous Builds
- 185 Techniques
- 19 Working with Wood
- 23 Painting Castings
- 4 Masonry
- 16 Scenery
- 37 Tools and Supplies
- 22 Layout Planning & Building
- 38 Miscellaneous
- 19 Prototype Information
- 18 Reference and Research
Another BEST 60 build: JimM
I've been slowly plugging away at this kit.
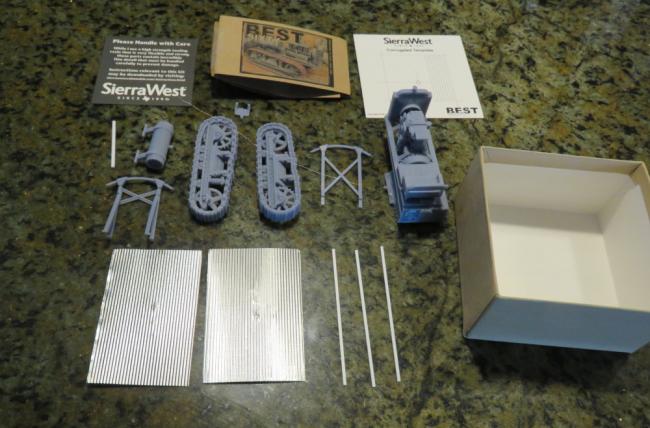
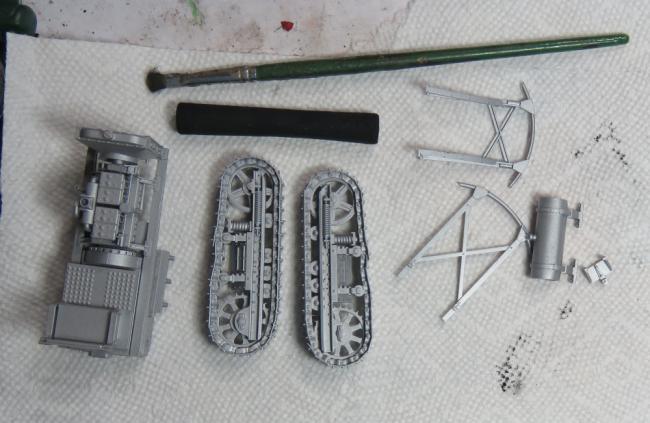
I first laid it all out to take inventory and take it all in. Inspecting the picture, I notice that I inadvertently left the "control cluster" out of the picture (oops, sorry Brett). Also note that the instructions for this kit are available for download on the SWSM site.
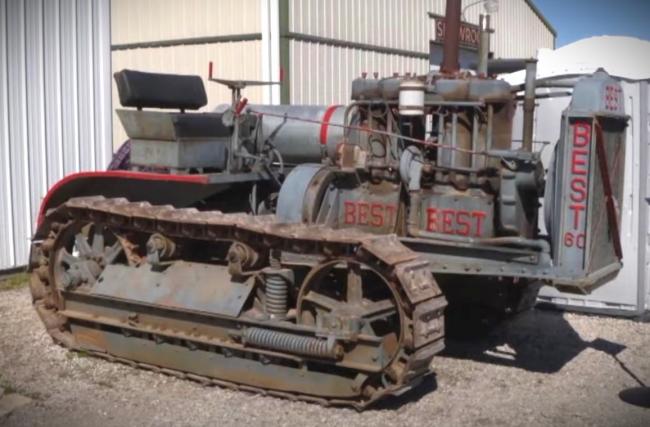
I've looked at hundreds of pictures and watched many videos of this crawler before deciding how I wanted to proceed. I decided I wanted to somewhat mimic this prototype. I will incorporate a few changes to the paint scheme but this is essentially what I am trying to reproduce.
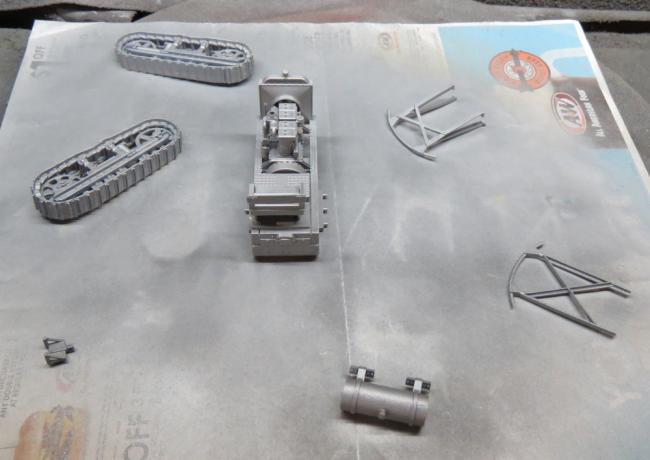
I want to start with a bare metal base so I will prime all the parts with a Rust-Oleum Metallic "Matte-Nickle" spray paint.
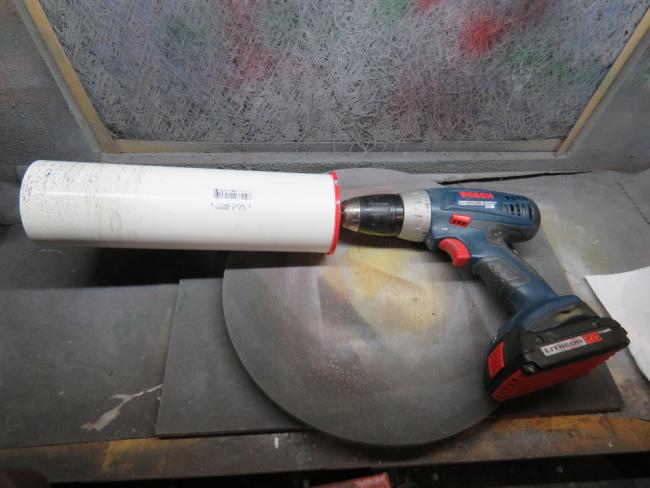
By the way, this is my spray paint can mixer, it works great. If anyone is interest in the parts to build, hit me up in a message.
I then hit all the parts with dry black chalk. I think this gives a nice "tarnished metal" look.
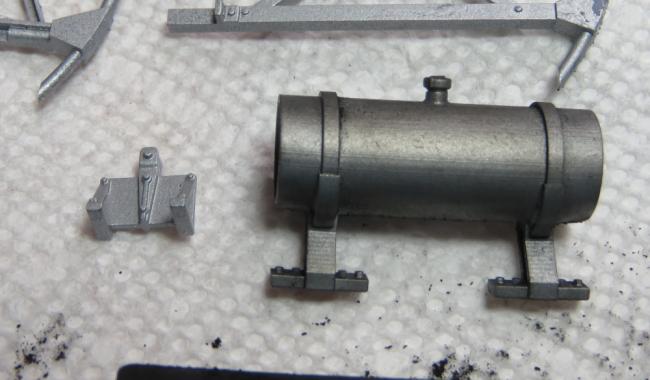
If anyone is wondering if the 3D parts can be made to look like the old white metal parts, I think this technique is spot on. The piece on the right is white metal after it has been blackened and buffed; not much difference at all.
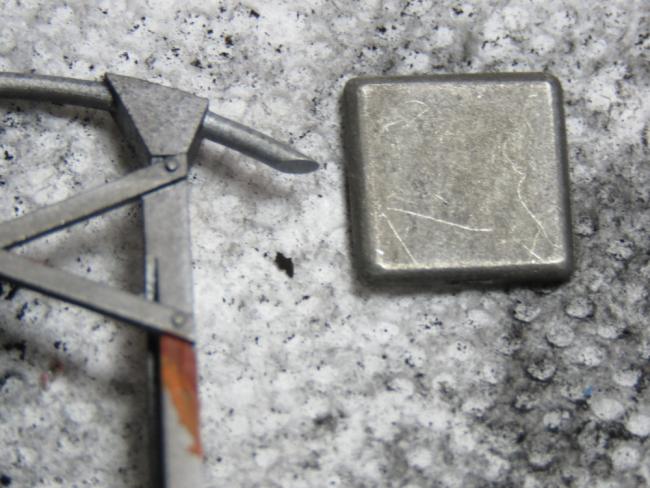
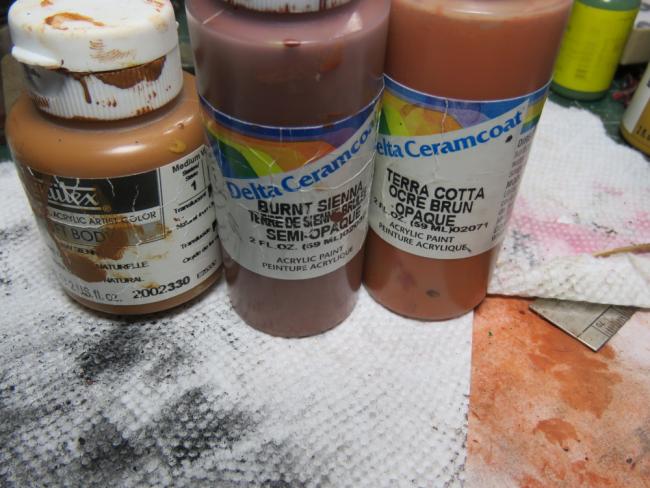
I wanted to try the "hairspray/salt" weathering technique, so I started by putting some rust spots on the various parts using some craft paint colors.
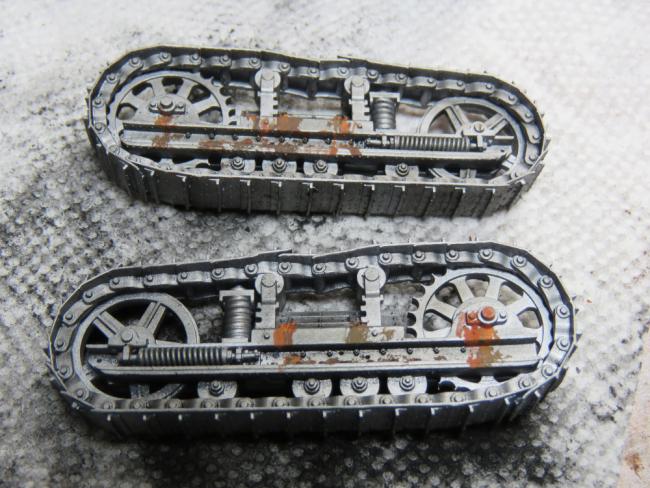
I then spray hair spray over the part and then apply salt over where I want to later expose the bare metal or rust.
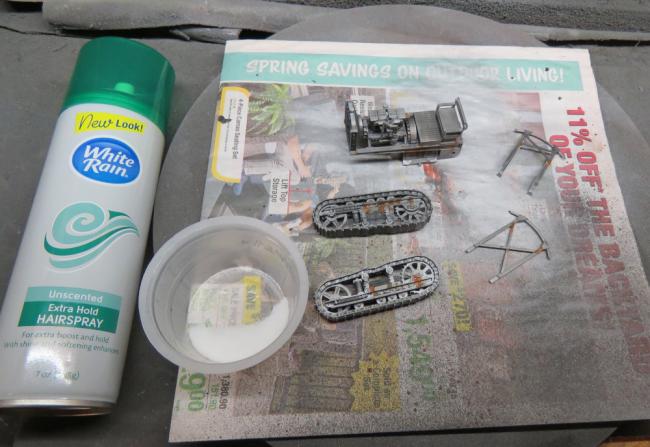
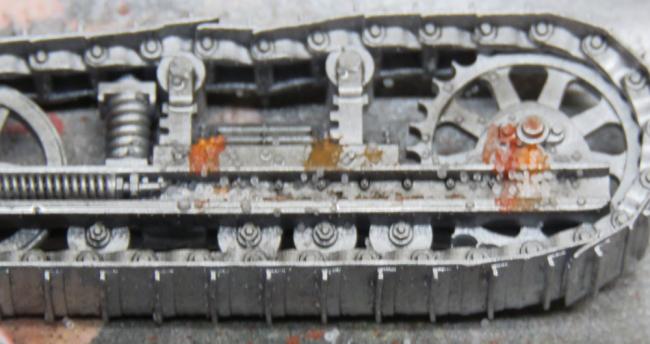
I then masked off the radiator, and then painted the entire main assembly and the front and back of the tracks with a Reaper "Concrete Grey" color using an airbrush by thinning the Reaper paint with a few drops of distilled water. After the paint dries, I chipped some of the salt off and I used warm, soapy water and a light brush to remove some of the paint in strategic areas so that the rust and bare metal show through, it give a bit of a chipped paint effect. This picture was taken after some additional chalking was applied.
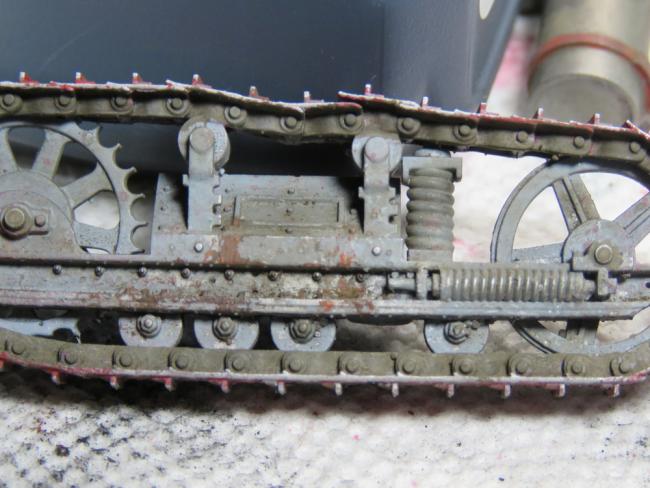
I wanted to go with the red track so I masked of the inner part of the track, sprayed more hairspray onto the track, let that dry a bit and then airbrushed a thinned Reaper "blood red" onto the track.

After the paint dries, I again used warm soapy water to remove some of the paint off of the track down to bare metal. Once dry, more chalks to dull and weather.
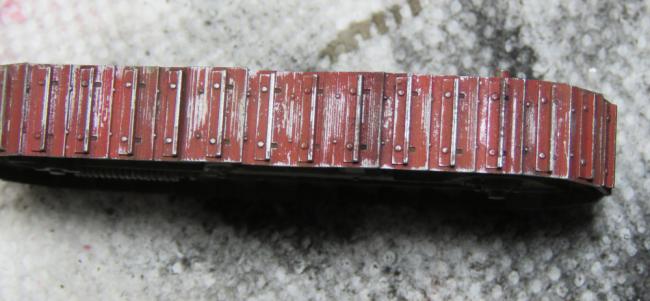
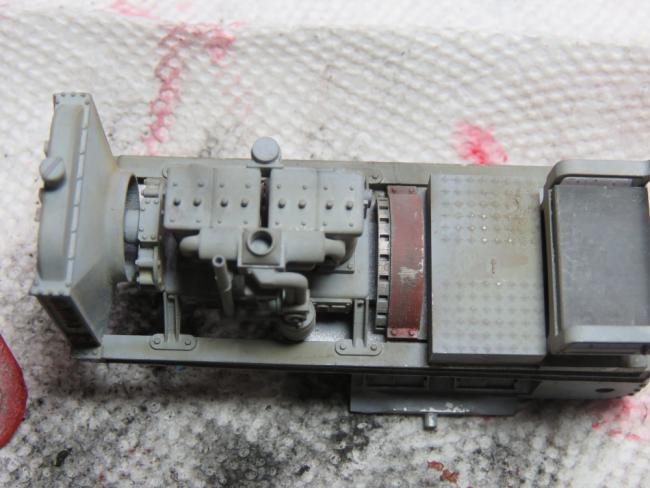
I then used the same hairspray/salt technique on the main body. After drying, I applied a lot of weathering chalks. I used the tip of a sewing needle to apply paint to the lettering on the body and the radiator. I painted the seat black and I painted the "doghouse" for the flywheel the same blood red color.
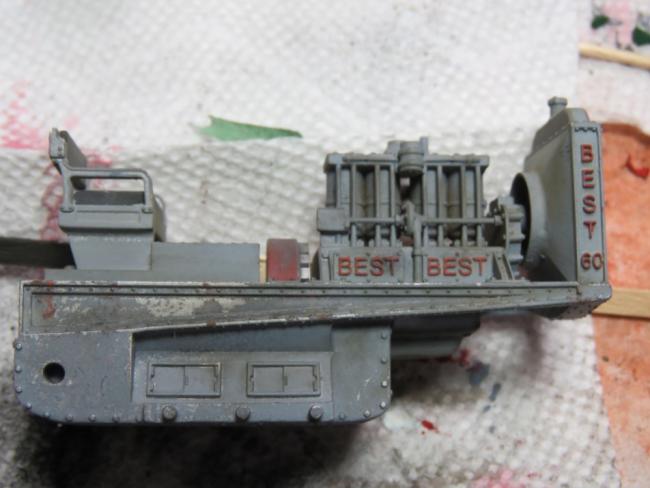
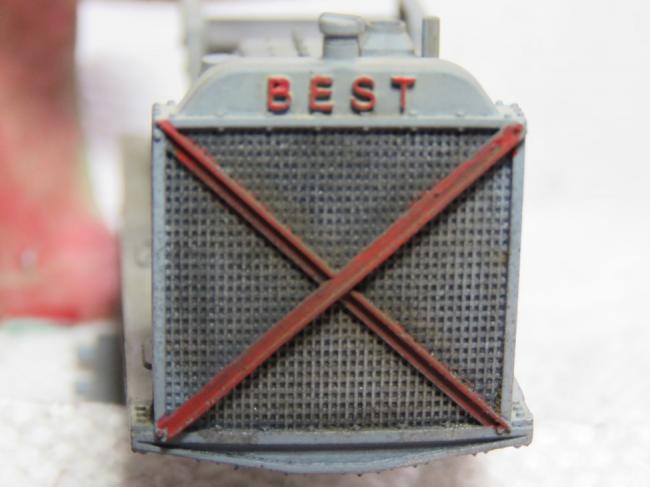
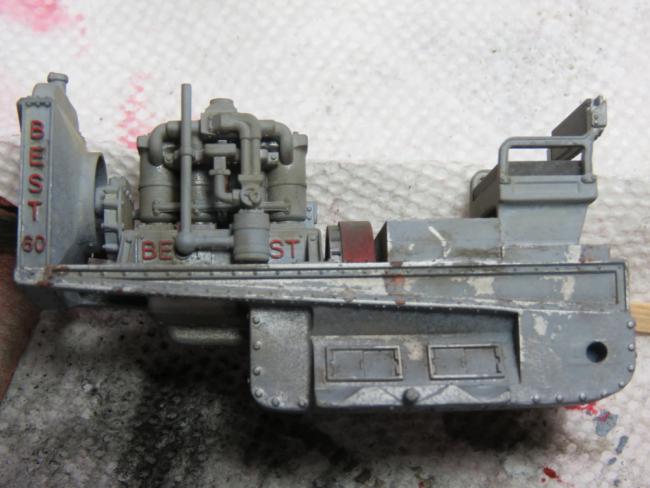
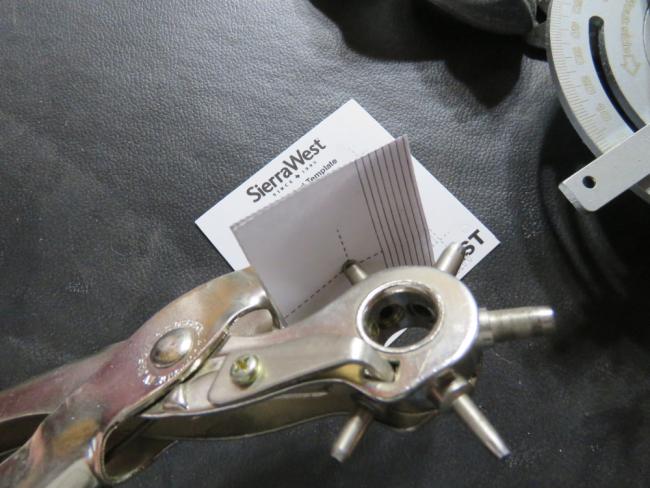
Moving on to the roof, I cut the corrugated sheets with the template and punched the hole for the exhaust with a leather punch.
I then spray painted the corrugated sheets and baked them and that's where I am right now. I should be able to finish up this wonderful kit tomorrow. I'll post the finished product when done. Thanks for looking.
I first laid it all out to take inventory and take it all in. Inspecting the picture, I notice that I inadvertently left the "control cluster" out of the picture (oops, sorry Brett). Also note that the instructions for this kit are available for download on the SWSM site.
I've looked at hundreds of pictures and watched many videos of this crawler before deciding how I wanted to proceed. I decided I wanted to somewhat mimic this prototype. I will incorporate a few changes to the paint scheme but this is essentially what I am trying to reproduce.

I want to start with a bare metal base so I will prime all the parts with a Rust-Oleum Metallic "Matte-Nickle" spray paint.
By the way, this is my spray paint can mixer, it works great. If anyone is interest in the parts to build, hit me up in a message.
I then hit all the parts with dry black chalk. I think this gives a nice "tarnished metal" look.
If anyone is wondering if the 3D parts can be made to look like the old white metal parts, I think this technique is spot on. The piece on the right is white metal after it has been blackened and buffed; not much difference at all.
I wanted to try the "hairspray/salt" weathering technique, so I started by putting some rust spots on the various parts using some craft paint colors.
I then spray hair spray over the part and then apply salt over where I want to later expose the bare metal or rust.
I then masked off the radiator, and then painted the entire main assembly and the front and back of the tracks with a Reaper "Concrete Grey" color using an airbrush by thinning the Reaper paint with a few drops of distilled water. After the paint dries, I chipped some of the salt off and I used warm, soapy water and a light brush to remove some of the paint in strategic areas so that the rust and bare metal show through, it give a bit of a chipped paint effect. This picture was taken after some additional chalking was applied.
I wanted to go with the red track so I masked of the inner part of the track, sprayed more hairspray onto the track, let that dry a bit and then airbrushed a thinned Reaper "blood red" onto the track.
After the paint dries, I again used warm soapy water to remove some of the paint off of the track down to bare metal. Once dry, more chalks to dull and weather.
I then used the same hairspray/salt technique on the main body. After drying, I applied a lot of weathering chalks. I used the tip of a sewing needle to apply paint to the lettering on the body and the radiator. I painted the seat black and I painted the "doghouse" for the flywheel the same blood red color.
Moving on to the roof, I cut the corrugated sheets with the template and punched the hole for the exhaust with a leather punch.
I then spray painted the corrugated sheets and baked them and that's where I am right now. I should be able to finish up this wonderful kit tomorrow. I'll post the finished product when done. Thanks for looking.

Comments
Travis, the punch idea is right out of the instructions so no need to steal.
I epoxied the control cluster and fuel tank and the upright supports for the canopy in place. I then glued the purlins for the canopy to the upright supports. Paying attention to the position, because the hole I've already punched in the corrugated aluminum for the exhaust has to line up to where it goes in the engine, and I wanted the purlin to come to the front of the canopy. The included purlins are a little bit long so it gives you a little wiggle room that they can be trimmed after the canopy is applied using a straight nail cutter.
I then, chalked, weathered, sooted, etc the roof and glued it in place.
All that was left to do was a little painting, I tried to add some oil and grease to the track rollers, tried to dirty up the engine under the frame a bit. I also added some dirt chalk to the tracks. I chose to not glue on the hitch as yet because I'm saving to do that if I need to tow something specific and need it at a specific height.
Here's the finished product.
I think the light gray gives more options when it comes to weathering as opposed to the black. I do like the black with red tracks and gold letters scheme though.
" I do like the black with red tracks and gold letters scheme though."
It was a flip of a coin. I really like that paint scheme too. Maybe the next one.
Beautiful work on a beautiful print.
Karl, thanks, Brett created a very nice, fun kit.
Awesome. Great build and tutorial. Thanks for sharing.
Later, Dave S Tucson, AZ
Dave, thanks so much. I don't know about it being a tutorial, more like a "what I did". I've never used this technique before, but I think I'm happy with the result. I hope to improve in the future.
Art, thanks, I'm looking forward to seeing your finished product as well.
Thanks Emery, it is a pretty cool kit.