Howdy, Stranger!
It looks like you're new here. If you want to get involved, click one of these buttons!
Categories
- 991 All Categories
- 3 Picture Posting and Resizing
- 60 New Member Introductions
- 118 Off-Topic Forum
- 2 Photography
- 2 Resources
- 18 New Product Information
- 170 The SierraWest Forum
- 12 Brett's Blog
- 120 General News & Ramblings
- 3 Re-Release Information
- 6 Q & A about SierraWest
- 9 What Would You Like to See?
- 408 Builds
- 146 HO Scale Builds
- 183 O Scale Builds
- 58 Finished SW Build Pics
- 15 Miscellaneous Builds
- 194 Techniques
- 19 Working with Wood
- 23 Painting Castings
- 4 Masonry
- 23 Scenery
- 37 Tools and Supplies
- 22 Layout Planning & Building
- 40 Miscellaneous
- 20 Prototype Information
- 19 Reference and Research
ALCO's Foss' Landing
The story of Foss' Landing is an old one. I found some old pictures of the time after old man Foss (shortened from Fossemangia when he landed at Ellis Island) bought out the two brothers and a second cousin who owned the land. They never could make anything of it and they were only too happy to get the fish smell out of their noses! The first picture is an old black & white; the second one looks like a Brownie camera was used.
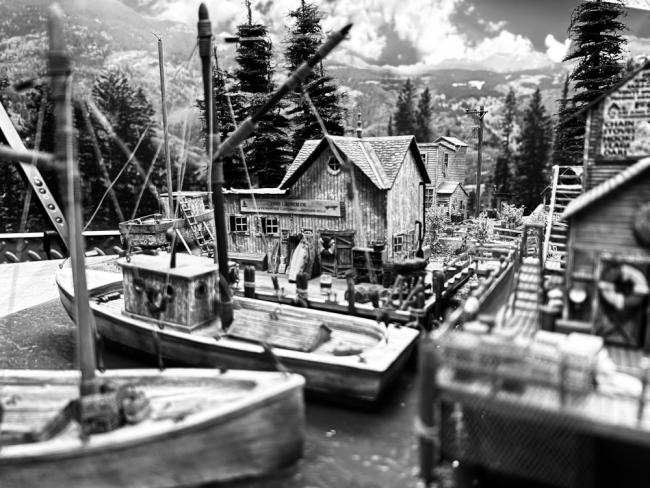
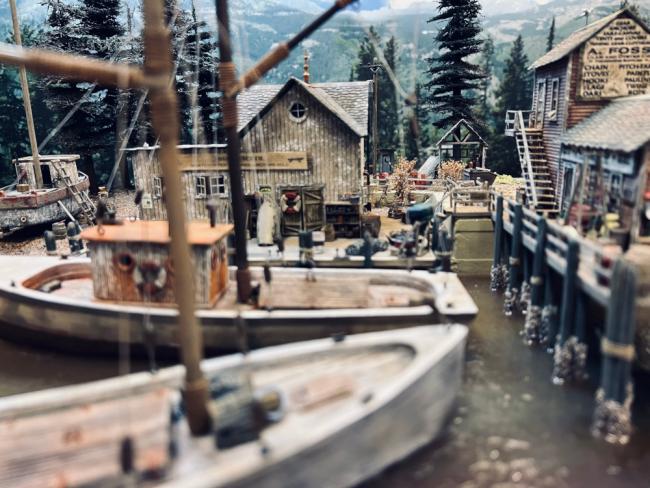
Still with me? Don't believe everything you read here. Anyway, with that backstory, I thought I'd try to recreate what things might have looked like back in the day. Here's the big picture. Normally the diorama is 16x16 but I added 3" along the "back" side as I've done on occasion. At the time, I had no idea what to put in the addition. I considered a piece of track since there's no track. But that didn't seem to fit so I employed the "theory of the self-solving universe"--if you wait long enough, the universe will give you an answer. And so it did! I use these additions to use up the stuff in drawer and cabinets but I usually end up buying some new and shiny thing. The two boats are the Addison and the Jewel, both purchased from SWSM. I highly recommend including them if this kit speaks to you.
A few words about my experience with the water effect. I used Envirotex Lite as recommended. I had pre-painted the wooden base with 3 different colors, lighter at shore and darker at the far edge. I had also used the wooden base as a cutting pad...so there were cut marks that needed covering up. My first pour was without any added coloring. That motivated me to add a little green to the next pour...which motivated me to add a good portion of brown to the last (3rd) pour. This blended/muted the paint on the board and gave what I considered a realistic result! The Envirotex instructions said you could remove bubbles with a hair dryer...or you could just exhale onto the resin!! I exhaled (literally and figuratively) and had an excellent result. Any bubbles are skeeters!
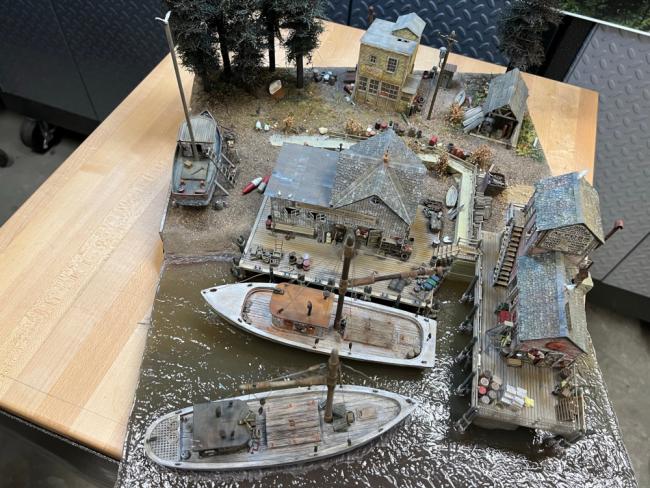
No track but two boats AND water?! Seems fair. Very different vibe on this dio as a result.
So let's start the tour with a shot of the Launch Co. and move to the left (more or less). Apologies in advance with photographic shortcomings.
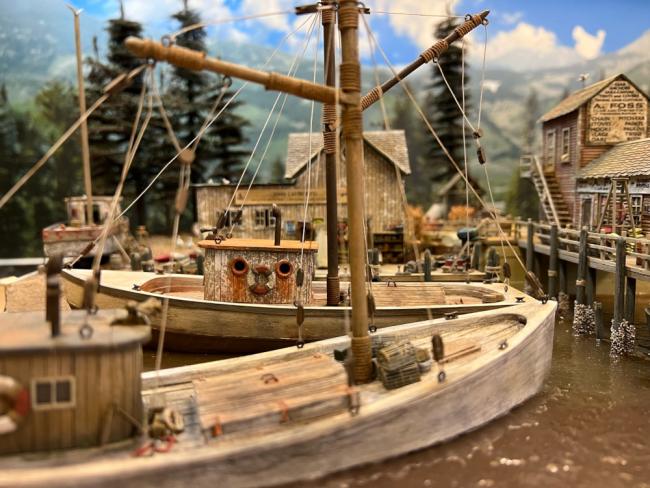
Zooming in a little to see what's on the dock...
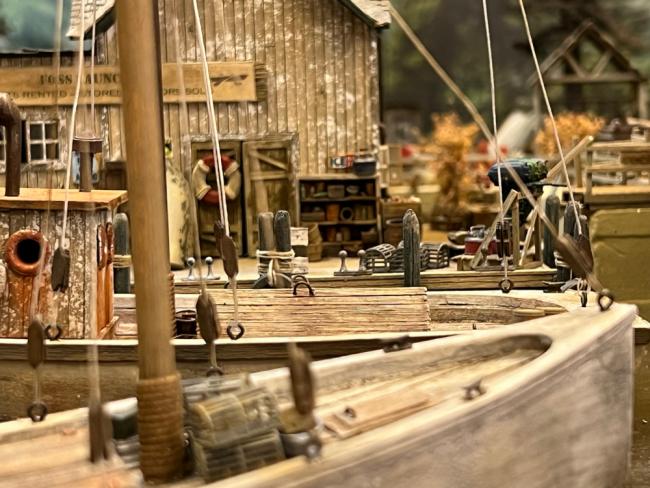
Foss handles not only the needs of the areas local fishermen but also welcomes the locals who want to get out on the water and maybe fish or get a few lobsters for dinner. See those Evinrudes on a stand with gas cans below them? They're for rent to go with those boats against the wall.
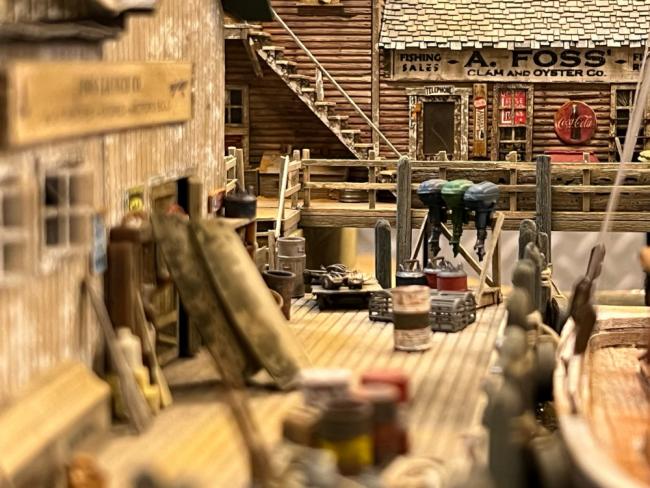
Moving more to the left, we see those outboards a bit better and see the Clam & Oyster building. They were putting up a new sign on the C&O. The old sign is leaning against the fence. Those old "dry transfer" signs just don't last!
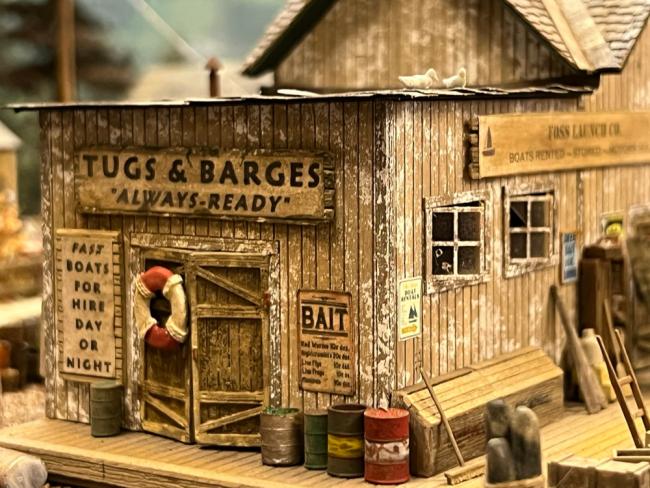
Let's keep moving...Birds! Always birds! What a mess! Sharp-eyed viewers may notice that the wall(s) with the 2 windows were installed upside down. Hey, more space underneath for details.
Somebody pulled this boat out of the water a while ago but that's about as far as it went. First time I've made and used this style of tree. I like how they turned out and will use them again. Not a kind of tree I see here in CO.
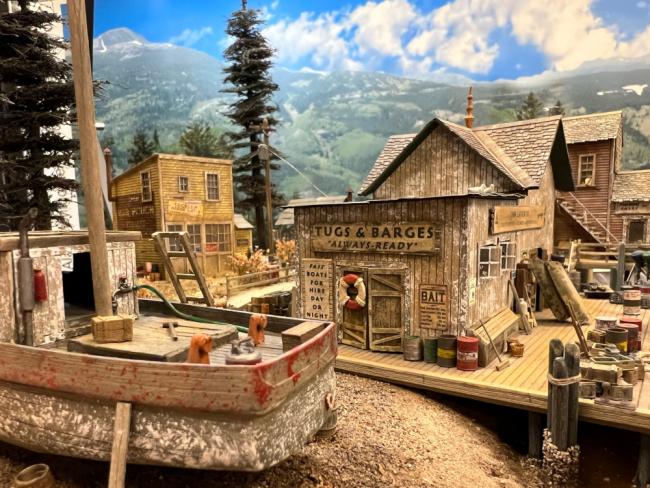
A shoutout to KKarns for including a powerline in his dios. Here I pay an homage to his creativity. This view also brings into focus the Clam & Oyster building.
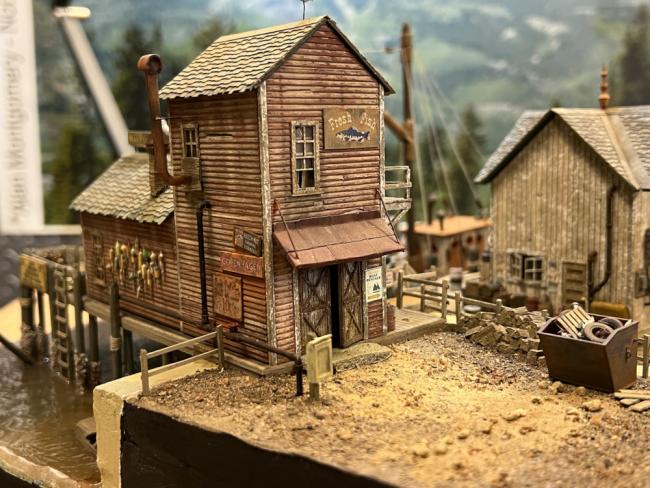
The boat shed has been around about as long as anything else at the Landing...and it shows.
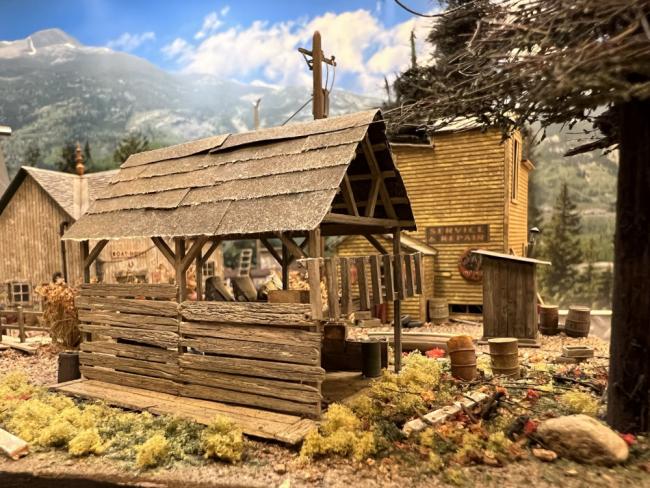
The old floats (my word) show up in lots of pictures I saw during my research for this project. I saw a building just like this one except the tall section was turned 90 degrees. The outside plumbing is 1/16 brass tubing with elbows etc. that I had on hand. The launch company has outside plumbing also but that's a one piece metal casting with added elbows where it goes into the wall. Another tip-o'-the-hat to KKarns!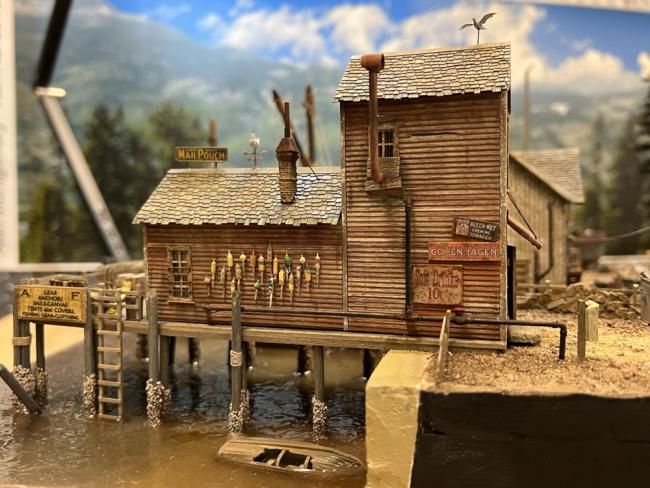
Our trip down memory lane ends about where we started-over the water.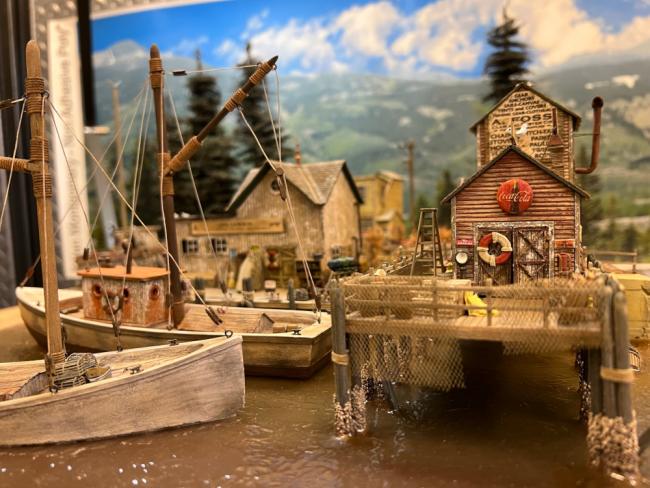


Still with me? Don't believe everything you read here. Anyway, with that backstory, I thought I'd try to recreate what things might have looked like back in the day. Here's the big picture. Normally the diorama is 16x16 but I added 3" along the "back" side as I've done on occasion. At the time, I had no idea what to put in the addition. I considered a piece of track since there's no track. But that didn't seem to fit so I employed the "theory of the self-solving universe"--if you wait long enough, the universe will give you an answer. And so it did! I use these additions to use up the stuff in drawer and cabinets but I usually end up buying some new and shiny thing. The two boats are the Addison and the Jewel, both purchased from SWSM. I highly recommend including them if this kit speaks to you.
A few words about my experience with the water effect. I used Envirotex Lite as recommended. I had pre-painted the wooden base with 3 different colors, lighter at shore and darker at the far edge. I had also used the wooden base as a cutting pad...so there were cut marks that needed covering up. My first pour was without any added coloring. That motivated me to add a little green to the next pour...which motivated me to add a good portion of brown to the last (3rd) pour. This blended/muted the paint on the board and gave what I considered a realistic result! The Envirotex instructions said you could remove bubbles with a hair dryer...or you could just exhale onto the resin!! I exhaled (literally and figuratively) and had an excellent result. Any bubbles are skeeters!

No track but two boats AND water?! Seems fair. Very different vibe on this dio as a result.
So let's start the tour with a shot of the Launch Co. and move to the left (more or less). Apologies in advance with photographic shortcomings.

Zooming in a little to see what's on the dock...

Foss handles not only the needs of the areas local fishermen but also welcomes the locals who want to get out on the water and maybe fish or get a few lobsters for dinner. See those Evinrudes on a stand with gas cans below them? They're for rent to go with those boats against the wall.
Moving more to the left, we see those outboards a bit better and see the Clam & Oyster building. They were putting up a new sign on the C&O. The old sign is leaning against the fence. Those old "dry transfer" signs just don't last!

Let's keep moving...Birds! Always birds! What a mess! Sharp-eyed viewers may notice that the wall(s) with the 2 windows were installed upside down. Hey, more space underneath for details.

Somebody pulled this boat out of the water a while ago but that's about as far as it went. First time I've made and used this style of tree. I like how they turned out and will use them again. Not a kind of tree I see here in CO.

A shoutout to KKarns for including a powerline in his dios. Here I pay an homage to his creativity. This view also brings into focus the Clam & Oyster building.

The boat shed has been around about as long as anything else at the Landing...and it shows.

The old floats (my word) show up in lots of pictures I saw during my research for this project. I saw a building just like this one except the tall section was turned 90 degrees. The outside plumbing is 1/16 brass tubing with elbows etc. that I had on hand. The launch company has outside plumbing also but that's a one piece metal casting with added elbows where it goes into the wall. Another tip-o'-the-hat to KKarns!

Our trip down memory lane ends about where we started-over the water.


Comments
I've always loved this dioramic scene, the structures and the boats are all just natural together.
You've done a beautiful job on this Alan and it's a pleasure to see your modeling on your take of this great classic kit.
Weathering, details, structures, water, boats, everything is so very well done.
Definitely one to be very proud of.
Now I'm going back for another look at all the stuff I missed the first time...
You captured the look perfectly of that , very well done.
Jerry
Terry