Howdy, Stranger!
It looks like you're new here. If you want to get involved, click one of these buttons!
Categories
- 954 All Categories
- 3 Picture Posting and Resizing
- 60 New Member Introductions
- 100 Off-Topic Forum
- 2 Photography
- 2 Resources
- 18 New Product Information
- 164 The SierraWest Forum
- 11 Brett's Blog
- 120 General News & Ramblings
- 3 Re-Release Information
- 1 Q & A about SierraWest
- 9 What Would You Like to See?
- 405 Builds
- 145 HO Scale Builds
- 185 O Scale Builds
- 58 Finished SW Build Pics
- 11 Miscellaneous Builds
- 185 Techniques
- 19 Working with Wood
- 23 Painting Castings
- 4 Masonry
- 16 Scenery
- 37 Tools and Supplies
- 22 Layout Planning & Building
- 38 Miscellaneous
- 19 Prototype Information
- 18 Reference and Research
SWSM wood techniques in 1:1 scale
A little while ago several of us were lamenting the lack of space to house our dioramas. I said I was looking to make some new shelves for mine. Well the project got started today. The plan is to have 2 freestanding units with 5 shelves each 32" wide and depths from 22" to 12".
I'm going to use the techniques I learned building SWSM kits to finish the shelves. The wood will get a distressed barnwood look and be mounted on industrial black pipe.
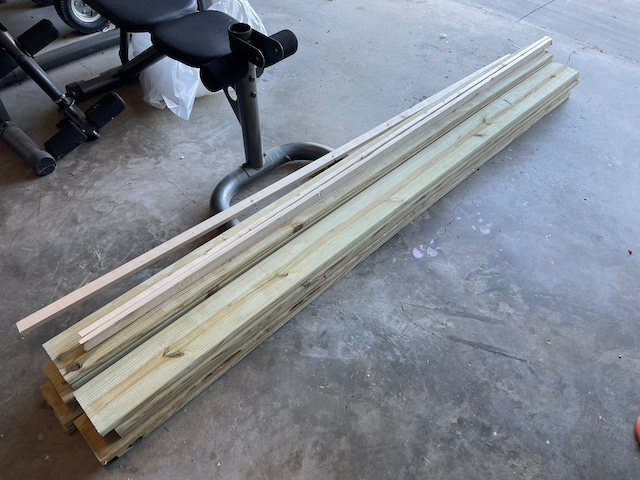
Start with a pile of wood. In this case, I went with 5/4" X 6. I wanted it to look thicker than standard 1X but didn't want to go with 2X. The 1X2 is for connections.
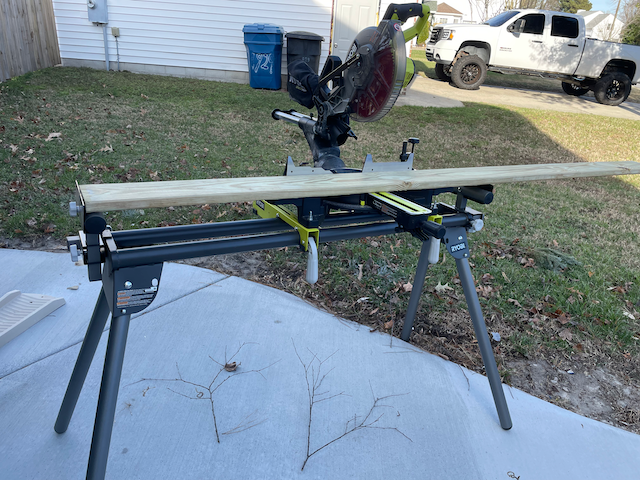
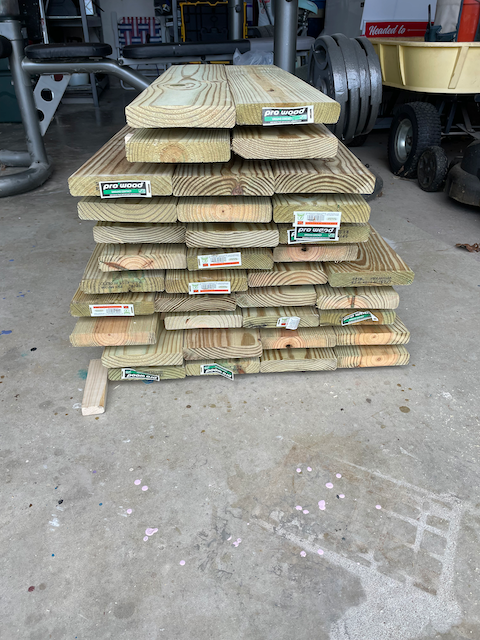
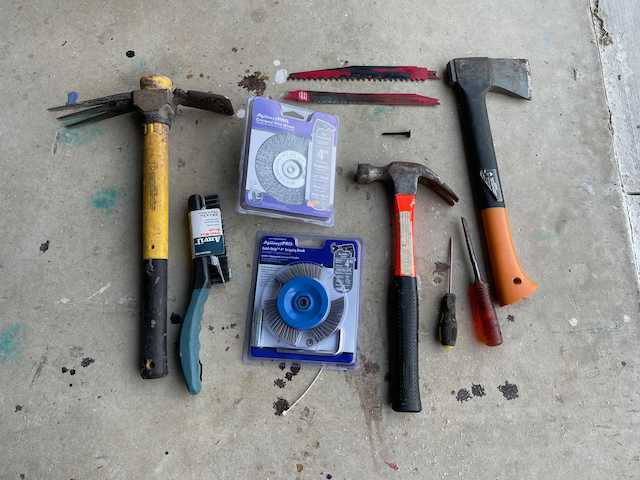
Set up the "chopper" and slice away. The wood is very wet (and treated) so I stacked it using the 1X2 the same as in the sawmill. I'll let it dry for a while but I'm anxious to start graining and staining as I am off for the next week. Shown here some of the distressing tools...just bigger versions of what we use on stripwood. Brushes for the drill and hand, pick, hammer, sawblade to do sawbanding, etc.
I'll update once the wood is ready to be worked.


Comments
Also, rust-oleum 2x paint is what i use on steel. It's very strong and primer mixed in. There is also a matt clear you can use as a top coat if you want.
A couple sticks were dry to work with today. This is with 1 coat of stain and is still wet. I have 4 done with a 2nd coat. We'll see what they look like tomorrow. Will likely give a light sanding to act as a drybrushing. Likely will not do any other top finish though it would be cool to do a peeling paint or some ground slime on a couple.
I went with a finer tooth blade for the sawbanding on the 2nd set. It's a more subtle effect.
Rest are still to wet too work with.
These shelf boards are awesome. I enjoy making small shelving projects using pine. It has great character and finishes great as evidenced by your project. Several coats of a matte finish is a great idea so that you will be able to remove dust easily. I generally keep a fresh can of Varathane Ultimate Polyurethane handy for projects. It is water based for easy clean-up and has a fast drying time for recoating plus it also offers scratch resistance.
Later Dave S. Tucson, AZ
Terry
Thanks for your question and observation. Stirring must be done very slowly for certain. I apply several thin coats of Varathane and sand between coats with wet/dry 400-600 grit sandpaper to insure a bubble free surface. Sanding also helps remove any brush strokes that may surface. I also wipe down the surface after each sanding an prior to applying the next coat with a tack cloth to remove the fine chalky residue. I have live edge mesquite end tables, a coffee table and other projects plus pine book shelves that have withstood the test of time very well.
Later, Dave S Tucson, AZ
Let's see the shelves Brett. I went with a lighter gray on the 2nd batch to see which I prefer.
I used 12g joiners on the ends and 16g in the middle of each board to secure them. I painted the galvanized joiners with a new paint I found. Behr spray, color flat metal amber. I started using flush mount screws but like the grip on the drywall screws better even though the head stands up a bit. Bonus, I won't need to paint them like the flush/silver screws. I did come up with a screw pattern for the middle after seeing this pic.
1 more night for the stain to dry then start with the clear coat.
Looking great so far, colour is really nice.
Here you go Mike. A few shots at various points of construction including the fishing gnome under the tree and Prospector Pete striking it rich. There are 3 bridges total in the scene. 2 from Black Bear jigs and 1 scratch built.
Anyways thank you for sharing the pics!