Howdy, Stranger!
It looks like you're new here. If you want to get involved, click one of these buttons!
Categories
- 991 All Categories
- 3 Picture Posting and Resizing
- 60 New Member Introductions
- 118 Off-Topic Forum
- 2 Photography
- 2 Resources
- 18 New Product Information
- 170 The SierraWest Forum
- 12 Brett's Blog
- 120 General News & Ramblings
- 3 Re-Release Information
- 6 Q & A about SierraWest
- 9 What Would You Like to See?
- 408 Builds
- 146 HO Scale Builds
- 183 O Scale Builds
- 58 Finished SW Build Pics
- 15 Miscellaneous Builds
- 194 Techniques
- 19 Working with Wood
- 23 Painting Castings
- 4 Masonry
- 23 Scenery
- 37 Tools and Supplies
- 22 Layout Planning & Building
- 40 Miscellaneous
- 20 Prototype Information
- 19 Reference and Research
HO Railroad Camp
Hi everyone,
Next in line is the Railroad Camp in HO. I managed to pick this one up on Ebay a few months ago. This one had the original hobby shop reservation slip in the box from 2002 so I believe it's the original run. Just like EJ Whiley, I don't have any more siding space for kits, so I'll be reconfiguring it for road service and possibly breaking up the structures.

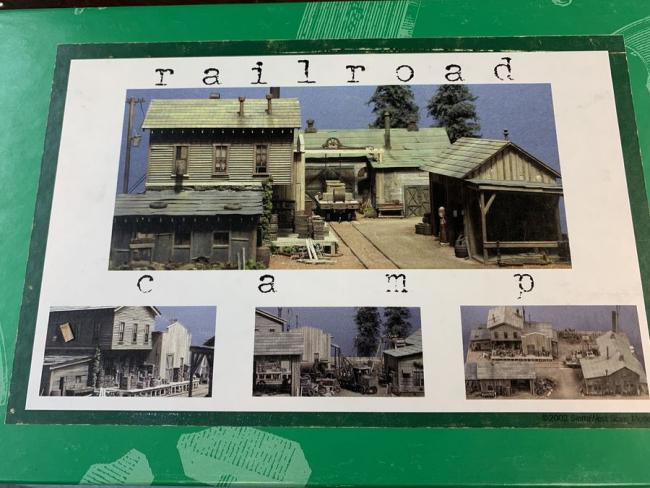
Most people know what this one looks like but here's the front of the green box.

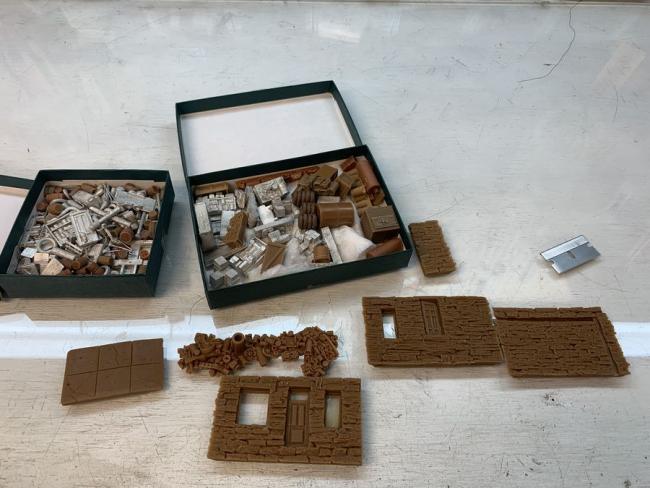
This kit might have the largest number of castings I've seen in a kit. Took me a few hours to sort, prime and blacken them.
Small start to the post here but I've got all the castings ready to go and most of the stripwood stained and sorted.
More photos coming.
Next in line is the Railroad Camp in HO. I managed to pick this one up on Ebay a few months ago. This one had the original hobby shop reservation slip in the box from 2002 so I believe it's the original run. Just like EJ Whiley, I don't have any more siding space for kits, so I'll be reconfiguring it for road service and possibly breaking up the structures.

Most people know what this one looks like but here's the front of the green box.

This kit might have the largest number of castings I've seen in a kit. Took me a few hours to sort, prime and blacken them.
Small start to the post here but I've got all the castings ready to go and most of the stripwood stained and sorted.
More photos coming.

Comments
Terry
Make sure you show us the placement when the kit is built up.
Jerry
I made a bit of progress on the kit last night but nothing too exciting. Slow start due to everyone in my house catching the flu, including myself.
In 2002 the method for building over a template was still gluing stripwood over a template covered in wax paper. I made a copy of each template assembly and I'm going to use double sided tape to build everything.
Framing is moving along...
That's all I have for now, not too interesting yet but stay tuned.
Jerry
I'm looking forward to following along with you as this progresses.
I was able to make some progress on the truck repair walls over the last few days.
I decided on a red color for the walls. I turned out a bit louder than I wanted. I used AK Interactive Burnt Red. Some toning down will be required before I'm happy with this but it's a start.
Trimmed off the excess...
Framed out the windows. In this older kit the window frames are built using scale 2x6s, the newer kits are laser cut.
I added the battens to the walls.
All the excess is trimmed off but this color needs some toning down.
I toned the walls down with both A&I and some chalks. I also added the windows. I feel much better about the wall coloring now that it's toned down a bit.
I glued the walls together.
That's all for the truck repair right now. At this stage this assembly looks like it gets set aside and I'll start working on the warehouse according to the instruction manual.
Thanks for following along.
As always your work is outstanding.
Jerry
For the stone first floor, I started with a gray primer coat, then an A&I wash, followed by the coloring of some of the stones with chalk and alcohol.
I blended the wall together with some more chalks.
I drybrushed the wall with linen craft paint.
Same process was used for the front wall.
I added the windows. This angle made the walls look extra grimy and dark, but they are a little lighter than this.
The stone walls are all glued together here.
Backside.
I used the coloring technique similar to the stone walls on The Foundry kit only I switched out gray primer instead of tan. The only thing not mentioned in the instructions that I did differently was I added some thick 1/4" wood in the corners to tighten it up, the miter joints alone were not going to stay together as I moved it around.
This is the base color for the 2nd floor. I've gotten some of the windows assembled and the corner trim, but I didn't take any photos last night. I should hopefully have an update for the 2nd floor tonight or tomorrow.
Thanks for following along everyone.
Well done
Terry
I spent a bit of time getting the second floor together yesterday and tonight.
Framed out the windows. On this kit the windows are framed with stripwood not laser cut like the newer kits.
Installed the laser cut windows into the openings.
After I glued all the windows in, I added some curtains and glued all the walls together.
Another angle.
Here I placed the assembled second floor on the stone base to see how it all looked together. The real test here was if both my second and first floor were true and square, it appears they are pretty close to it.
This card represents the floor of the second floor. The laser cut line is where the boards under the overhang need to stop.
2x10s are laid under the overhang.
That's all for tonight, next up is weathering the 2x10s a bit more and gluing the floor in place, then I'm going to start on the tarpaper shed to the left of the stone base.
The coloring of the clapboard was done using light green craft paint applied over textured A&I stained clapboard, first washed with some mineral spirits to help keep the paint from adhering to the walls. After the paint starts to dry I use a wire brush to knock some of it off and give it that faded look, using tape to get a peeling paint effect works well over the mineral spirits but I only really like the peeling paint look in HO with lighter colors like white or light gray. On this wall I added some light nail holes followed by another wash of A&I.
The 2nd floor doesn't get glued to the stone base until after the stone base is glued to the diorama. I'm not sure if I'm going to follow that plan but for now, I'll set everything aside and keep moving forward.
The assembling of all the structures minus the roofing works well for me as I don't really know how I'll be laying out everything in the scene on the layout. This gives me time to work everything out and get a feel for the scene, plus putting together 4 walls of a structure every couple days keeps me motivated even if the structures are very far from complete.
Thanks for following along.
Terry
I made some progress on the shed attached to the stone building.
First, I framed out the walls over the templates, using the windows as a guide to keep the openings correct.
The boards are laid over the framing. I didn't spend much time detailing the boards since they will be covered with tarpaper, I just wanted the wood detail to be there when I tear away some of the paper.
The walls are covered in tarpaper, and I started to pick at it to give it some character. I didn't use the paper provided with the kit, instead I used black tissue paper spray with dark gray auto primer.
Glass was added to the windows and the windows are glued in place.
I glued the 3 walls together, added the battens and weathered everything up a bit.
I assembled the front wall as well, but I forgot to take any photos. The front wall doesn't get any tarpaper and the boards are horizontal.
Thanks for following along. I started on the next sub-assembly so I should have an update tomorrow.