Howdy, Stranger!
It looks like you're new here. If you want to get involved, click one of these buttons!
Categories
- 954 All Categories
- 3 Picture Posting and Resizing
- 60 New Member Introductions
- 100 Off-Topic Forum
- 2 Photography
- 2 Resources
- 18 New Product Information
- 164 The SierraWest Forum
- 11 Brett's Blog
- 120 General News & Ramblings
- 3 Re-Release Information
- 1 Q & A about SierraWest
- 9 What Would You Like to See?
- 405 Builds
- 145 HO Scale Builds
- 185 O Scale Builds
- 58 Finished SW Build Pics
- 11 Miscellaneous Builds
- 185 Techniques
- 19 Working with Wood
- 23 Painting Castings
- 4 Masonry
- 16 Scenery
- 37 Tools and Supplies
- 22 Layout Planning & Building
- 38 Miscellaneous
- 19 Prototype Information
- 18 Reference and Research
Clamps
Just thought I would throw this out there to share with you all.
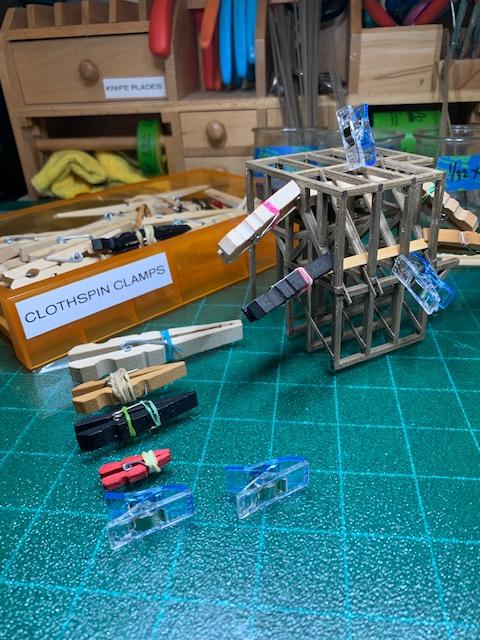
Working on the Ho version of the Deer Creek Mine and ran across on page 20 of the instructions on Cloths Pin Clamps.
This is a great technique and cheep to make submitted by Karl Allison to Brett a while back.
I have been using this method on all my Brand X kits for a few years before I found SW and is a must to do!!
I also got a bit frustrated with the clamp springs not staying on, sliding off..etc... and not the pressure I wanted on certain areas.
I added rubber bands to eliminate the disengagement between the two and the rubber bands also act as a cetain pressure you want depending on the how many wraps of the rubber band. You will also notice I use 4 different sizes of cloths pins.
The Little plastic clamp shown at bottom are Cake Pop Cone clamps that I got from my wife who has a Cake Pop business. They are made buy SinFul Cutters.
Just my two cents guys
Chris


Comments
Another little tip is to 'carve' down the clamping end on several of your pins, this can be very helpful in tight situations, especially HO.
I just grabbed a few of mine to show...
Also notice the one bottom left has had the back end carved out so it can open wider.
Adjust as needed...
Thin out the thickness of some wooden ones.
Stealing these ideas! Thanks boys
That's how we all get better!!
Later, Dave S. Tucson, AZ
Thanks for the "heads-up" on those smaller clamps. Next trip into Tucson I give them a "look-see".
Later, Dave S.
A lot of the clamps in the right drawer I picked up at Dollar Tree. Most dollar stores are hit-n-miss as to what they’ve got in stock and selection varies from store to store as well. I look in the craft section, school supply area and around the automotive stuff (That’s where I found the spring clamps with the black handles). They’re pretty chintzy but I’ve wasted a dollar on worse things. Different shapes, sizes, materials, and tension because: