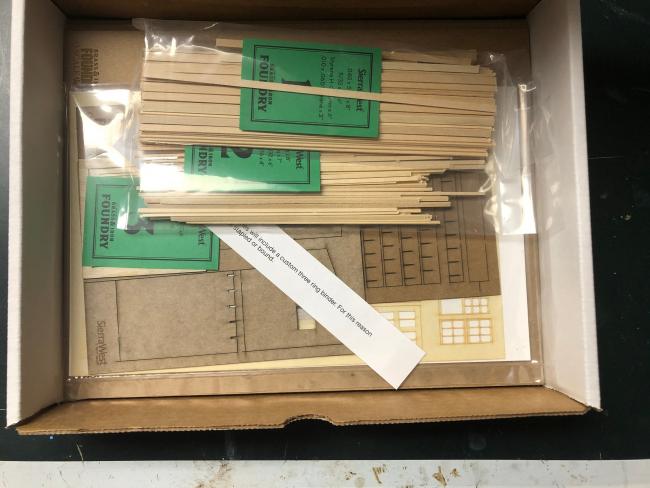
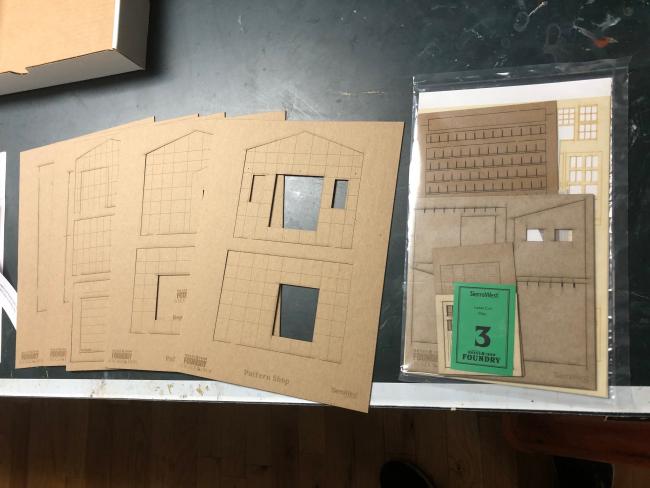
Well the Kit just arrived on Thursday and it looks like there are already 2 builds running. Unboxing is pretty straight forward in this kit as it is the basic structure. That said The basic structure informs everything else on the diorama, it sets the tone and dates the buildings. I figure I have 2 months or so until the second instalment comes out so I will take my time and try some new techniques and see if they measure up. I am so excited about this build and honoured to contribute my insight. That said my way is likely not exactly what others envision so just take what you want from this build and use your own favourite techniques to fill in the rest.
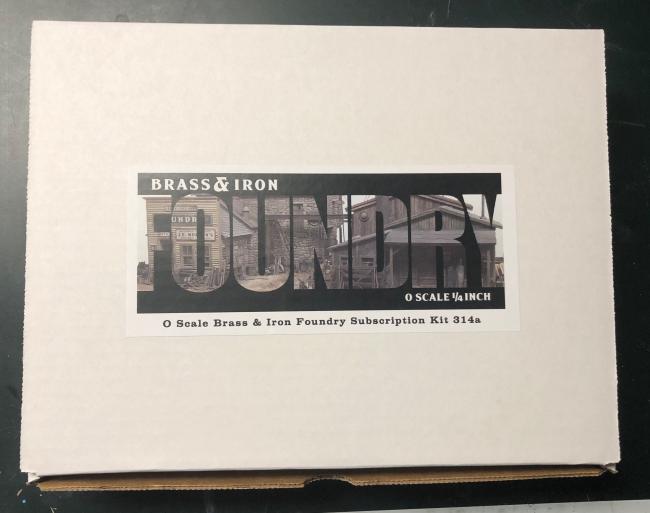
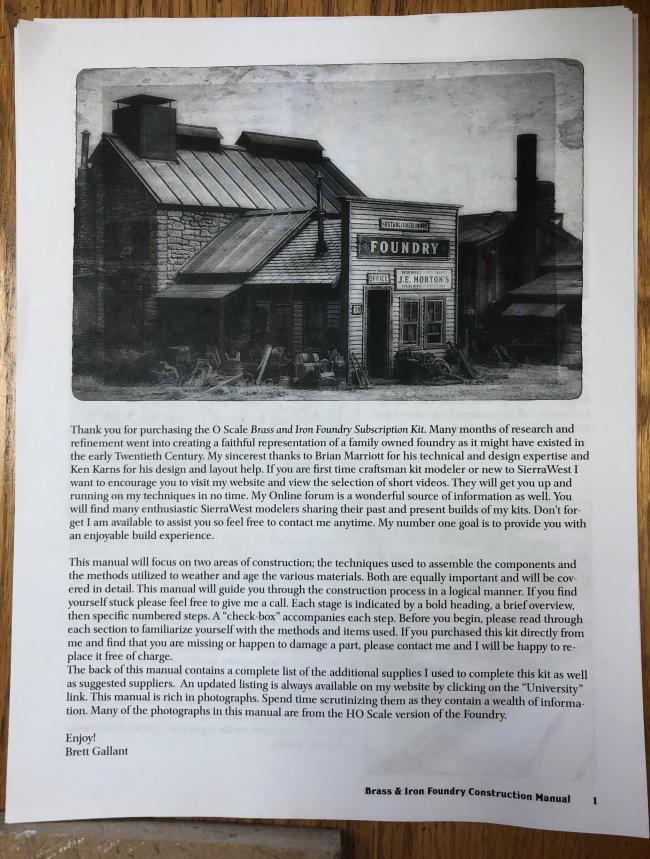
I've already read the manual cover to cover twice to prep for starting this build. I also plan on rereading Ken's fabulous HO build and see if I can steal some ideas there.
Glad to see you joining in. I like bouncing ideas off of you during builds.
Like you, I've read the manual and have already been going through Ken's build. I plan on trying new techniques as well. I did a test wall of wet-brushing today to get some practice in. Think I'll do it.
glad you guys are along for the ride. Might want to hold off on the damp brushing for a day or two as I do have a new twist on it that I'm kinda proud of. Here's an test from a recent build of mine:
Your test wall looks great. I am certainly glad I jumped on purchasing this kit when Brett first offered it. Like many of, you I have the kit and will begin to read the manual and follow along on the three amigos builds as they unfold. This is super exciting to be able to see three extraordinary modelers put their artistic interpretations and ideas to such a unique kit.
Thank Kevin. I'm sort of wrecking the flow here but ah well.... So I had a Bob Ross painting night with the family and I pulled out my paint set from 40 years ago and found my old fan brush. I find it way easier to get the damp brushing effect than with the round brush recommended by Brett. I hope it's not just that it is stiff from being so old as I'm hoping some of you will be able to recreate this effect. It is so easy, quick and is almost as good as the mineral spirit resist method. I have always struggled to get consistent results with mineral spirits and on top of that there is the health risks. I find mineral spirits work incredibly well but only about 1/3 of the time. Just my experience obviously. Somehow Karl did his incredible Loco/engine shed entirely with mineral spirits and was super consistent.
I hope to get the wood distressed this weekend and start some tests on the wood from this kit, including trying a mixture of both techniques.
I think this is a great result. Certainly a great start on this new project. I will be sitting on the first row... (if there is still a seat available.. )
I decided to hold on with the build until I have the whole 'ensemble' of kits that will make the Foundry . I still have plenty of other SW projects and I think it will be easier ( for me) to have a better overview with al the kits at hand. But since patience is THE main ingredient for any modeler, the waiting won't be an issue...
Anyway, I am glad Joël , that you take care of the building honors for this one. This will guarantee some interesting and educational posts on this marvelous forum.
Happy and healthy Easter to you guys (and your loved ones) Robert
I had the same thought to wait till the entire kit shows up....I have all the time in the world right now.....the retired thing was enough with more time....but we've been kind locked down here in Jersey for almost a month....only time I leave the house is to go to a fire incident or get toilet paper...I've got 3 projects going already...just put 2 on the side for a bit.....
Bob Ross, did you say Bob Ross? The happy "fan brush" painter! For Father's Day last year my wife and daughter teamed up and got me a Bob Ross leisure shirt. Most likely to get even with me for watching his painting shows back in the day. Good thing the people here in Sun City, Tucson get a kick out of it. I keep threatening them that I'll wear it on the airplane next time we fly back to Chicago for a family reunion. LOL.
I used the pipe brush and a file card to put in the initial grain on all the strip wood for the Pattern Shop. My first deviation from the manual (knew it wouldn't be too far in) is to detail both sides of the stripwood. Total waste of 50% of the time but I have my reasons. First of all I am not that consistent and the wire brush is very random so sometimes it produces an unrealistic pattern and by doing both sides it takes an extra hour or two but I get to choose the better looking side. Also almost all stripwood has a better side with less "fuzzies". Lastly but less importantly when I work both sides the strip wood tends to stay straight which makes it easier to work with.
To add further details I use the standard stuff: a dental pick, razor blade and bead reamer. The reamer lets me make random size holes instead of all knot holes being identical. On this part of the build I only added a dozen knot holes in total because most are painted over. I stain the toothpicks first and then glue them into the siding after it is stained.
I scan along each piece of grained stripwood and try to find spots where a knothole might fit. Where the grain wavers or there is an open ungrained area. I'll test out some base stains tonight and report back tomorrow.
Brett I agree whole heartedly. I tried a few different base stains the top two are alcohol and chalk, then black craft paint then dark brown craft paint (paint on and rub of as much as possible with a paper towel) and finally good old silverwood. The dark brown paint and the chalk appear almost identical in person but the camera adds a darkness to the paint. Not sure why but both alcohol based stains swelled the wood and erased much of the fine graining. I use 99% so it shouldn't be the water content. Also the craft paints have water in them and yet they retain the definition - weird.
Today I will test the colour with 3 methods - damp brushing with a fan brush. Wetting the stripwood with mineral spirits and then damp brushing ( the mineral spirits prevent good adhesion and the flaking paint effect might be more pronounced ) and finally the old mineral spirit resist - labour intensive, time consuming and smelly but the gold standard.
Thanks for sharing your results from base stain lumber coloring experiment. I too, often get the same results as you experienced (losing the fine wood grain details scratched into my scale wood) even when I use 99% isopropyl alcohol to prevent swelling. I would have never suspected that would occur out here in the very dry climate of the Tucson desert.
OK the test results are in: First of all I did the standard labour intensive 3 coats of mineral spirits (until there is a sheen) then 2-3 coats of paint waiting 5 minutes between each coat. Then run the xacto blade up and down each piece a couple of times. Then using scotch tape gently removing paint chips. Really pleased with the results Then I tried something new. Coat the wood with mineral spirits like before and then damp brush with the fan brush. the mineral spirits and gently touch make it so the paint only sticks in some areas and leaves the wood pain free in others. For both of these it is 24 hrs later and I still can't go near them as they still stink.
Version three is as I suggested earlier just damp brushing with a fan brush. I use a windsor Newton #3 series J. Dip it in the craft paint and the dab off the excess on the edge of my paint cup (not dry brushing where you remove almost all the paint) Then very gently brush along with the grain. I use the brush with the fan perpendicular to the grain sometimes but I actually get better effects when I use it with the fan parallel to the grain.
Picture is a bit dark on the ;last one but I have to admit the original mineral spirit is still my favourite but I'm not sure if all the work and frustration is worth what is about a 5% improvement in detail. I think I will do about half and half and use the various boards randomly. When I say randomly I mean very carefully selected for each wall.
Joel, I always appreciate your experimentation so we can judge for ourselves what we would like to do if this was our build. In the end, however, it's your choice. A mixture might not be a bad thing. Phil
The wood graining looks great! I'm definitely going to try a few of these methods because I have the same experience with losing most of the grain effect when using even the higher percent concentration alcohol. Thanks for letting us all learn from your experimentation.
I have used the mineral spirits method on my Loco Service shops and I am really pleased the way it turned out. But I am going to have to try your method using the fan brush. If you are doing a number of models, you don't want them to look the same.
Finished peeling the paint on all the wood. As always I had trouble with the mineral resist and it was quite hit and miss. The damp brushing was way more controllable. Here's my pile: It still stinks 24 hrs later so moved on to the next step and I gave a light spray of colour to the walls in case any peeks through. After reading Ken's HO build twice I have decided to unabashedly try to copy Ken's remarkable build. After struggling with changing things up for the sake of changing them I realize that it is unlikely I will come up with something better. I added the framing to the walls so they can show through the decaying boards.
I did an extra set of corner posts as my mineral spirit ones were pretty disappointing. The extras are just for bracing anyway so I figured why not give it a go. I went back to my damp brushing with a fan brush. Much better: Hope the mineral spirits evaporate in the next few days so I can start planking the walls
Comments
Jerry
Like you, I've read the manual and have already been going through Ken's build. I plan on trying new techniques as well. I did a test wall of wet-brushing today to get some practice in. Think I'll do it.
Your test wall looks great. I am certainly glad I jumped on purchasing this kit when Brett first offered it. Like many of, you I have the kit and will begin to read the manual and follow along on the three amigos builds as they unfold. This is super exciting to be able to see three extraordinary modelers put their artistic interpretations and ideas to such a unique kit.
Later, Dave S. Tucson, AZ
Later, Dave S.
joel, are you going to tell us what the alternative to da,mp brushing is? your boards look pretty great.
I hope to get the wood distressed this weekend and start some tests on the wood from this kit, including trying a mixture of both techniques.
Jerry
I decided to hold on with the build until I have the whole 'ensemble' of kits that will make the Foundry . I still have plenty of other SW projects and I think it will be easier ( for me) to have a better overview with al the kits at hand. But since patience is THE main ingredient for any modeler, the waiting won't be an issue...
Anyway, I am glad Joël , that you take care of the building honors for this one. This will guarantee some interesting and educational posts on this marvelous forum.
Happy and healthy Easter to you guys (and your loved ones)
Robert
Robert, that's not a bad idea to wait and get everything before starting.
Bob Ross, did you say Bob Ross? The happy "fan brush" painter!
For Father's Day last year my wife and daughter teamed up and got me a Bob Ross leisure shirt. Most likely to get even with me for watching his painting shows back in the day. Good thing the people here in Sun City, Tucson get a kick out of it. I keep threatening them that I'll wear it on the airplane next time we fly back to Chicago for a family reunion. LOL.
Later, Dave S.
To add further details I use the standard stuff: a dental pick, razor blade and bead reamer. The reamer lets me make random size holes instead of all knot holes being identical. On this part of the build I only added a dozen knot holes in total because most are painted over. I stain the toothpicks first and then glue them into the siding after it is stained.
I scan along each piece of grained stripwood and try to find spots where a knothole might fit. Where the grain wavers or there is an open ungrained area.
I'll test out some base stains tonight and report back tomorrow.
Today I will test the colour with 3 methods - damp brushing with a fan brush. Wetting the stripwood with mineral spirits and then damp brushing ( the mineral spirits prevent good adhesion and the flaking paint effect might be more pronounced ) and finally the old mineral spirit resist - labour intensive, time consuming and smelly but the gold standard.
Thanks for sharing your results from base stain lumber coloring experiment. I too, often get the same results as you experienced (losing the fine wood grain details scratched into my scale wood) even when I use 99% isopropyl alcohol to prevent swelling. I would have never suspected that would occur out here in the very dry climate of the Tucson desert.
Later, Dave S. Sunny, Tucson, AZ
First of all I did the standard labour intensive 3 coats of mineral spirits (until there is a sheen) then 2-3 coats of paint waiting 5 minutes between each coat. Then run the xacto blade up and down each piece a couple of times. Then using scotch tape gently removing paint chips. Really pleased with the results
Then I tried something new. Coat the wood with mineral spirits like before and then damp brush with the fan brush. the mineral spirits and gently touch make it so the paint only sticks in some areas and leaves the wood pain free in others.
For both of these it is 24 hrs later and I still can't go near them as they still stink.
Version three is as I suggested earlier just damp brushing with a fan brush. I use a windsor Newton #3 series J. Dip it in the craft paint and the dab off the excess on the edge of my paint cup (not dry brushing where you remove almost all the paint) Then very gently brush along with the grain. I use the brush with the fan perpendicular to the grain sometimes but I actually get better effects when I use it with the fan parallel to the grain.
Picture is a bit dark on the ;last one but I have to admit the original mineral spirit is still my favourite but I'm not sure if all the work and frustration is worth what is about a 5% improvement in detail. I think I will do about half and half and use the various boards randomly. When I say randomly I mean very carefully selected for each wall.
Here's my pile:
It still stinks 24 hrs later so moved on to the next step and I gave a light spray of colour to the walls in case any peeks through. After reading Ken's HO build twice I have decided to unabashedly try to copy Ken's remarkable build. After struggling with changing things up for the sake of changing them I realize that it is unlikely I will come up with something better.
I added the framing to the walls so they can show through the decaying boards.
I did an extra set of corner posts as my mineral spirit ones were pretty disappointing. The extras are just for bracing anyway so I figured why not give it a go. I went back to my damp brushing with a fan brush. Much better:
Hope the mineral spirits evaporate in the next few days so I can start planking the walls