Howdy, Stranger!
It looks like you're new here. If you want to get involved, click one of these buttons!
Categories
- 954 All Categories
- 3 Picture Posting and Resizing
- 60 New Member Introductions
- 100 Off-Topic Forum
- 2 Photography
- 2 Resources
- 18 New Product Information
- 164 The SierraWest Forum
- 11 Brett's Blog
- 120 General News & Ramblings
- 3 Re-Release Information
- 1 Q & A about SierraWest
- 9 What Would You Like to See?
- 405 Builds
- 145 HO Scale Builds
- 185 O Scale Builds
- 58 Finished SW Build Pics
- 11 Miscellaneous Builds
- 185 Techniques
- 19 Working with Wood
- 23 Painting Castings
- 4 Masonry
- 16 Scenery
- 37 Tools and Supplies
- 22 Layout Planning & Building
- 38 Miscellaneous
- 19 Prototype Information
- 18 Reference and Research
Yet another O'neills Fabrication JimM
I've not posted any pictures till now and I've admired everything I've seen on this forum. There sure are many great modelers here.
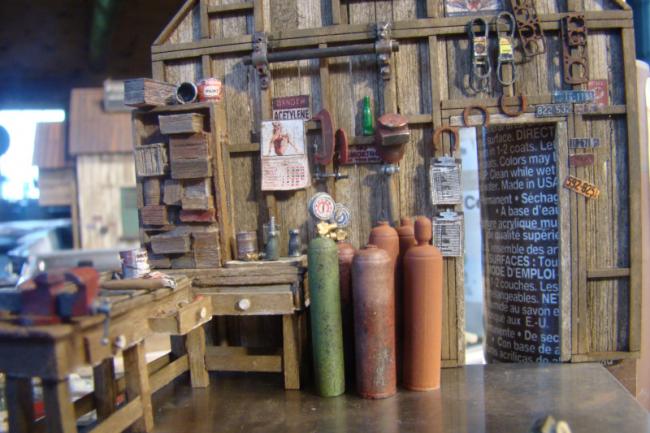
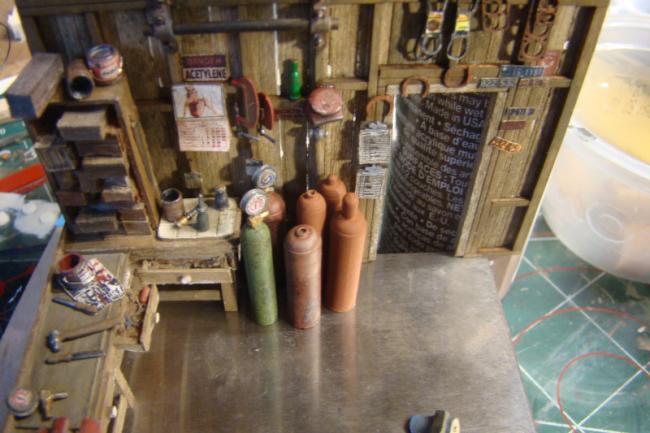
I've been working on my O'neills build so I thought I'd post a few pictures of what I've done so far on one of the interior walls of the welding shop. The back wall is just propped up on a 123 block at this time. Most of the tanks are not painted or "weathered" as yet but I just wanted to see how it would look. This kit has been a blast to build and I've learned so much. I love the techniques described in the manual, many are new to me. I'm trying to keep this build true to the manual and maybe I'll be more original in my next kit but I love the "feel" of what was created in the pictures in the manual.
Boy, you sure can get carried away painting these details. Fun.


Jim
I've been working on my O'neills build so I thought I'd post a few pictures of what I've done so far on one of the interior walls of the welding shop. The back wall is just propped up on a 123 block at this time. Most of the tanks are not painted or "weathered" as yet but I just wanted to see how it would look. This kit has been a blast to build and I've learned so much. I love the techniques described in the manual, many are new to me. I'm trying to keep this build true to the manual and maybe I'll be more original in my next kit but I love the "feel" of what was created in the pictures in the manual.
Boy, you sure can get carried away painting these details. Fun.
Jim

Comments
You are off to a great start. Really like what I am seeing of your detail paint work and placement. Nice photos as well. The reflective surface under the wall and details is really effective. On one of my structures I am using a polished concrete floor but it doesn't have the same reflective patina as yours has in these sample photos.
Later, Dave S. Tucson, AZ
Thanks. The reflective surface is just a 123 block I'm resting the walls on but it does look pretty cool. As far as the placement of the details, the credit goes to Brett as I've pretty much duplicated his pictures in the manual.
Thanks, I spent lots of time studying your thread on the build. Thanks for your help.
Jim
Great realistic feel for the color of the weathered siding and roofs. I really like your flashing detail work on the bump-out. Keep on keeping on.
Later, Dave S. Tucson, AZ
You could add a streak of spatter under each wheel...maybe some metal dust as well.
Nice cardboard box.
Mike S.
I made a resin casting of the stove and put in "flame effect" LED's from Evan design. I think I have to lower the intensity of the flame a bit but I'm happy with the results. OSHA probably not gonna like the open flame.
Merry Christmas
Jim