Howdy, Stranger!
It looks like you're new here. If you want to get involved, click one of these buttons!
Categories
- 997 All Categories
- 3 Picture Posting and Resizing
- 60 New Member Introductions
- 118 Off-Topic Forum
- 2 Photography
- 2 Resources
- 18 New Product Information
- 171 The SierraWest Forum
- 12 Brett's Blog
- 120 General News & Ramblings
- 3 Re-Release Information
- 6 Q & A about SierraWest
- 9 What Would You Like to See?
- 412 Builds
- 146 HO Scale Builds
- 183 O Scale Builds
- 62 Finished SW Build Pics
- 15 Miscellaneous Builds
- 194 Techniques
- 19 Working with Wood
- 23 Painting Castings
- 4 Masonry
- 23 Scenery
- 37 Tools and Supplies
- 22 Layout Planning & Building
- 40 Miscellaneous
- 21 Prototype Information
- 20 Reference and Research
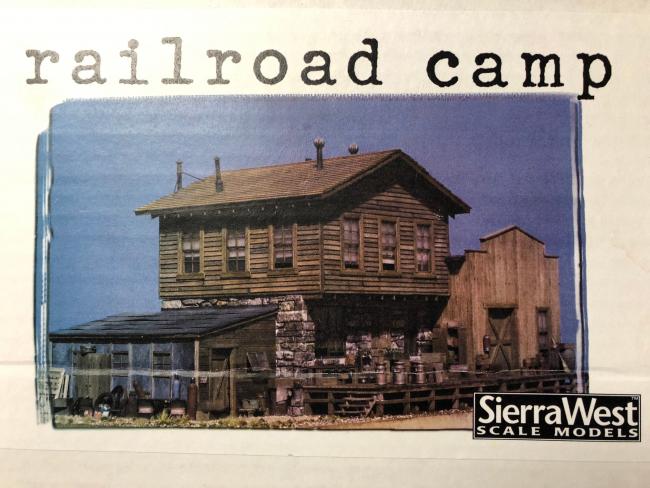
Another O scale Railroad Camp
Hi All, in anticipation of the imminent release of Rail Road Camp part 2 I have decided to start part 1. No way I will finish it before part 2 arrives and I move on but hopefully I can get some of the main structure done and then when I finish part two I'll combine them and do the final details.
There have been other great builds of this amazing kit so I'll try and just comment on the things I plan on doing a bit differently.
Very excited to delve into a "new" SW kit. The smell of urethane is calling to me.
There have been other great builds of this amazing kit so I'll try and just comment on the things I plan on doing a bit differently.
Very excited to delve into a "new" SW kit. The smell of urethane is calling to me.


Comments
Terry
Jerry
Karl.A
Typical wire brush and file card to distress. To colour I tried something new. First I dry brushed the wood with white craft paint. Really wiped off the paint and then scrubbed it onto the boards 3-4 at a time. Can hardly see any white on them.
I then painted on dark brown/grey acrylic and quickly wiped off the board (one at a time). The dark colour picks up the white and becomes much lighter on the raised surfaces and the dark colour is pushed into the grain. You get a different effect if you wipe with paper towel, cotton cloth or finger tips. I find the best effect was with fingers.
The picture is a bit dark but it looks good in person. Now I can add a little chalk to give some more variations in colour.
Because this is untried I weather both sides of the strip wood so I get more choices in the next step when I glue on the siding. I search through the entire pile and pick out all the really good boards which I will use for the front and left side. As opposed to the directions I will start with the important walls and use all the great wood there and then move on to the less important walls and use up the left over wood.
Along with a few other SWSM O-Scale modelers, I have this kit waiting for the arrival of the RR Camp Truck Repair Shop kit, Part 2 of this group of 3 structures. I have even picked up a few truck kits to include in a future diorama. I'll be following your build of this kit closely as I am a fan of your builds.
Later, Dave S. Tucson, AZ
Terry
Terry, Ive successfully done CA in different colours on each side of boards for the effect you describe.
5 boards at a time, keep them tight together, stain the lighter colour first. once stained lift the boards straight up so that the under side doesn't get in the mess. wipe the working area clean, repeat for all boards. Once dry do exactly the same for the otherside of the boards in the darker colour.
It takes a little longer but isn't really hard or a big deal.
My locoshop is grey on the outside and brown on the inside, all done with CA washes/colouring, which is similar to what you want, I've also done it on a few other builds, no problems.
Karl.A
Terry
Terry
You can see the colouring of the boards better in these photos too.
And now the complete first wall (before detailing)
Some good tips in today's postings.
Interesting to see how the coloring of the same clapboards changes a bit from photo to photo. I think it just shows that often times we get a bit tense when we post photos that don't match what we see from the naked eye to the camera photo. To many variables among focal length, light, aperture and lens speed to wig out.
Later, Dave S. Tucson, AZ
Jerry
please explain what you mean when you refer to CA.